Italian Focaccia: Herb-Infused Flatbread with Olive Oil Brilliance
Recipe
|
March 8, 2026
Italian Focaccia has been perfected over generations, with each culture adding its own signature techniques and flavors. Learning these methods at home gives you control over every variable, from ingredient quality to cooking time. The process may seem intimidating at first, but breaking it into clear steps makes it accessible to anyone willing to try.
High-Hydration Dough for an Open Crumb
My focaccia formula uses 500 grams of all-purpose or bread flour, 375 grams of water, 10 grams of salt, and 3 grams of instant yeast. The 75 percent hydration produces a dough that is sticky and slack, which is exactly what creates the large, irregular air pockets inside. I mix the flour, water, and yeast together first and let them rest for 20 minutes before adding the salt.
This autolyse period gives the gluten a head start and makes the dough easier to handle later. After adding the salt, I mix by hand for about 3 minutes until the dough is cohesive but still rough. It does not need to pass a windowpane test; the stretch-and-folds during bulk fermentation will develop the gluten fully.
Coil Folds During Extended Fermentation
I ferment the dough at room temperature for a total of 4 hours, performing a coil fold every 45 minutes for the first 2 hours. A coil fold involves sliding my hands under the dough, lifting it from the center, and letting the ends tuck under themselves as I set it back down. This gentle handling preserves the air bubbles that have formed while still strengthening the structure.
After the second hour, I leave the dough undisturbed for the remaining 2 hours. By the end of bulk fermentation, the dough should be visibly puffy, jiggly when the bowl is shaken, and increased in volume by roughly 80 percent.
Shaping and the Olive Oil Bath
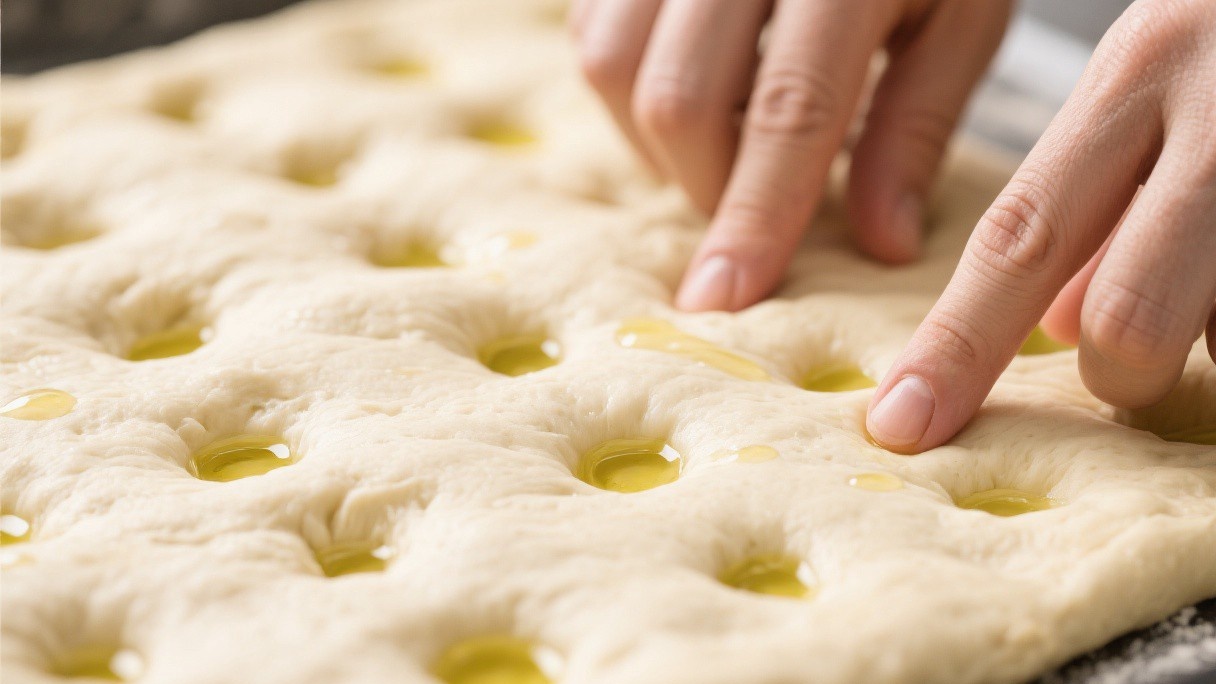
I transfer the dough to a half-sheet pan that has been coated generously with 3 tablespoons of extra-virgin olive oil. The oil prevents sticking and contributes to the crisp bottom crust. I stretch the dough gently toward the edges of the pan, and if it resists, I let it rest for 10 minutes and try again. Once the dough fills the pan, I cover it with a damp towel and let it proof for 45 minutes at room temperature.
During this proof, the dough relaxes and rises further. After proofing, I dimple the surface with my fingertips, pressing firmly enough to create wells that will hold the olive oil. Then I drizzle another 3 tablespoons of olive oil over the top, letting it pool in the dimples.
Herb Topping and Baking
For a classic Genovese-style focaccia, I scatter a mixture of fresh rosemary leaves, coarse sea salt, and thin slices of garlic over the oiled surface. The rosemary should be stripped from the woody stems and left whole; it will roast in the oven and release its aromatic oils into the bread. I bake at 230 degrees Celsius on the middle rack for 22 to 25 minutes, rotating the pan once at the halfway mark.
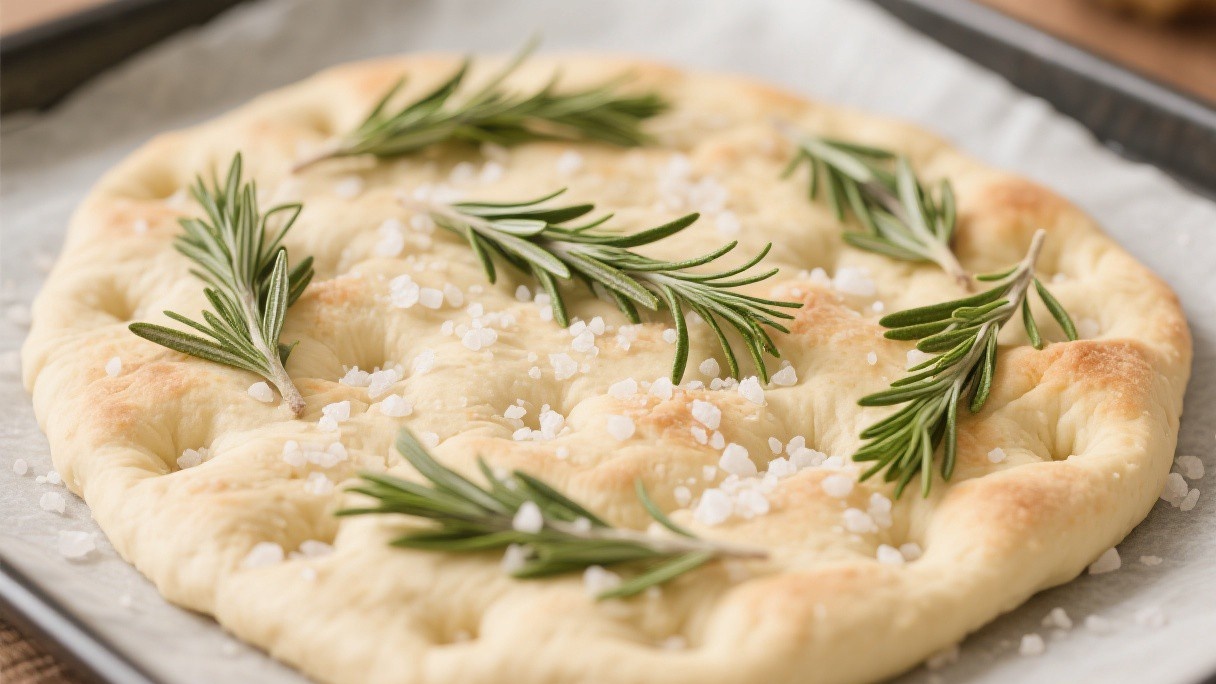
The focaccia is done when the top is golden brown and the olive oil around the edges is bubbling. I let it cool in the pan for 5 minutes, then transfer it to a wire rack. The bottom should be deeply golden and crisp, while the interior remains soft and airy.
Variations and Storage
Once you have the base method, the variations are nearly limitless. I add halved cherry tomatoes and a handful of grated Parmesan for a version that works as a light lunch. Caramelized onions and Gruyere make an excellent combination for a savory breakfast bread. Focaccia keeps well at room temperature for up to 2 days wrapped in a cloth, and it freezes effectively for up to a month.
To reheat, I place it directly on the rack of a 200-degree Celsius oven for 5 minutes, which restores the crispness of the crust. The olive oil in the dough prevents it from staling as quickly as lean breads, which is one of the practical advantages of this style.
Making Focaccia by Hand Without a Mixer
While a stand mixer makes the initial mixing easier, focaccia can be made entirely by hand with no special equipment. I mix the flour and water together in a large bowl with a wooden spoon until a shaggy dough forms, then cover it and let it rest for 20 minutes. After the rest, I add the salt and incorporate it by squeezing and folding the dough with my hands for about 2 minutes.
The coil folds during bulk fermentation develop the gluten fully, so the initial mixing does not need to produce a smooth dough. The only adjustment I make when working by hand is to wet my hands with water before each fold, which prevents the dough from sticking to my skin. I have found that hand-mixed focaccia actually develops slightly better flavor, because the slower, gentler mixing gives the yeast more time to produce aromatic byproducts during the extended fermentation.
Practice builds confidence faster than any amount of reading. Keep a notebook of what works and what needs adjustment, and do not be afraid to deviate from the recipe once you understand the basics. The best cooks are those who learn from every batch, successful or not.