Beverage
March 24, 2026
Indian Lassi: Yogurt-Based Drinks Sweet and Savory
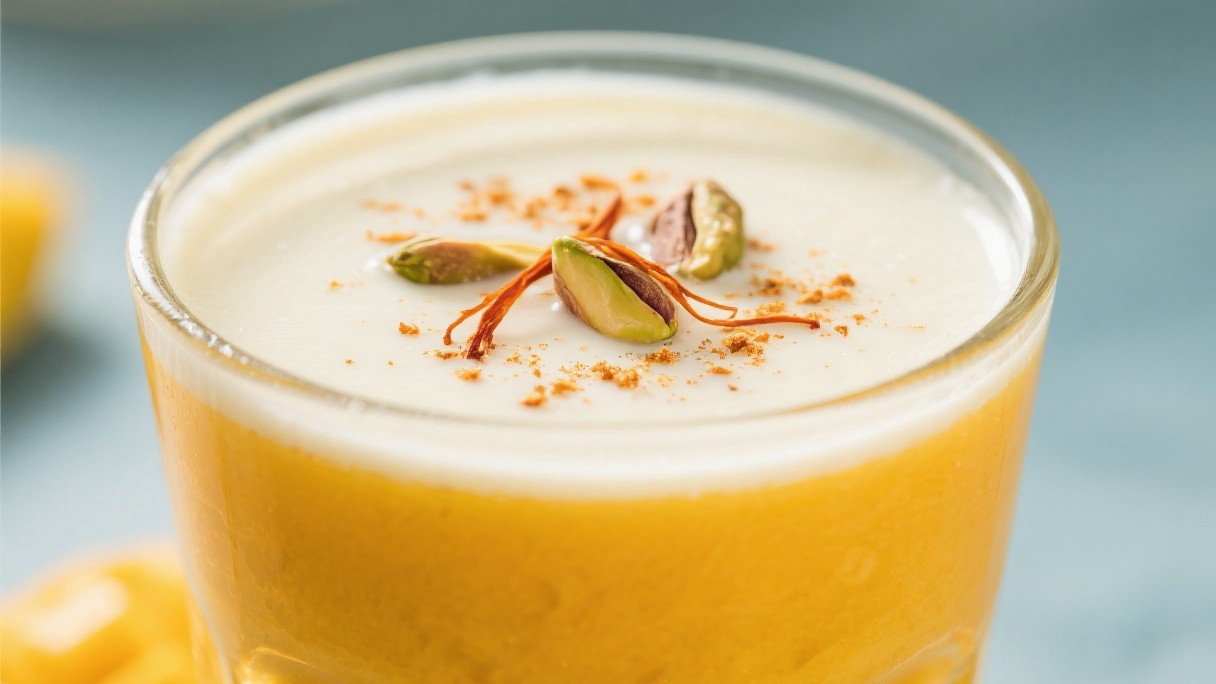
Master the art of indian lassi with this comprehensive guide featuring expert tips, essential techniques, and practical advice. Key topics covered include the yogurt base: whole milk and homemade, mango lassi: fruit selection and sweetness, savory salt lassi with cumin, cardamom and rose water variations. The Yogurt Base: Whole Milk and Homemade The best lassi starts with whole-milk yogurt that is thick, tangy, and not too sour. I make my own yogurt by heating 1 liter of whole milk to 90 degrees Celsius, holding it at that temperature for 10 minutes to denature the whey proteins, then cooling it to 43 degrees Celsius and stirring in 2 tablespoons of plain yogurt from a previous batch as a starter. The milk incubates at 43 degrees for 6 to 8 hours until it sets into a firm, slightly jiggly curd.
Read Details
March 20, 2026
Korean Makgeolli: Unfiltered Rice Wine Brewing at Home
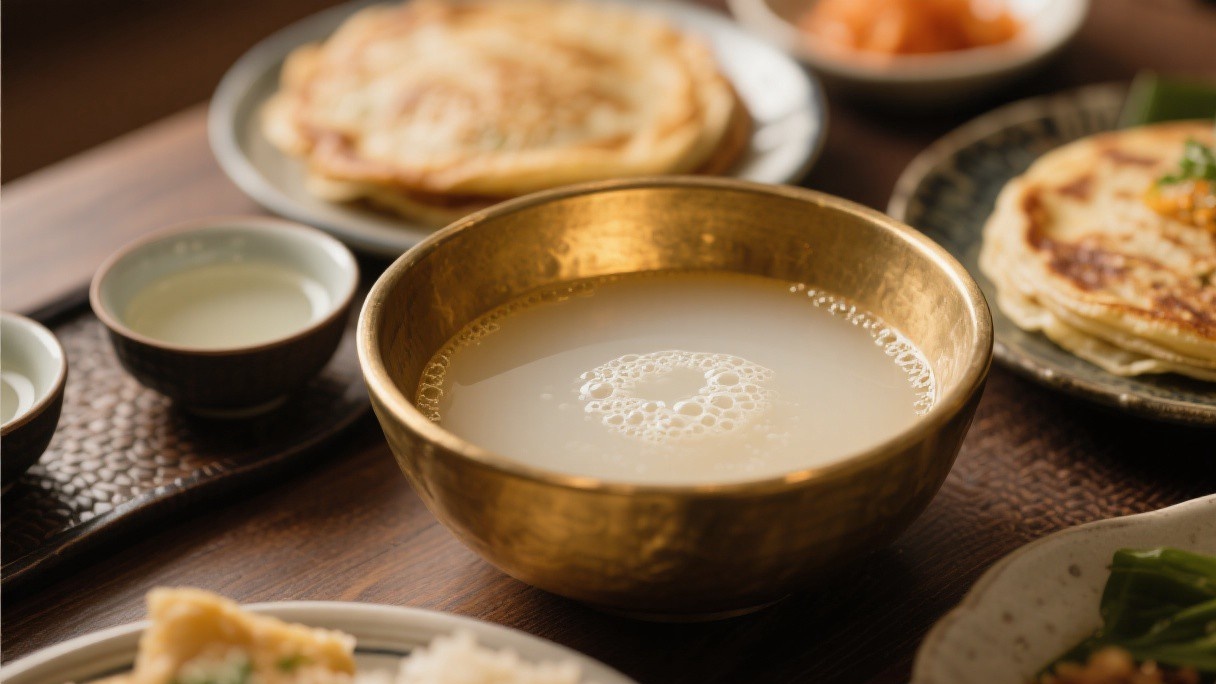
Master the art of korean makgeolli with this comprehensive guide featuring expert tips, essential techniques, and practical advice. Key topics covered include how nuruk transforms rice, preparing and steaming the rice, mixing and the primary fermentation, secondary fermentation and carbonation. How Nuruk Transforms Rice Nuruk is the fermentation starter that converts rice starch into fermentable sugars and then into alcohol. It is made from wheat, rice, or barley that has been soaked, ground, shaped into cakes, and left to ferment naturally, allowing wild yeasts and molds to colonize it. The primary microorganism in nuruk is Aspergillus oryzae, which produces the enzymes that break down starch. The rice soaks in fresh water for 4 hours, then I drain it and steam it in a steamer basket lined with cheesecloth for 40 minutes. Steaming, rather than boiling, is important because it gelatinizes the starch without adding excess water, which would dilute the final product.
Read Details
March 17, 2026
Peruvian Pisco Sour: Egg White Foam and Bitters Technique
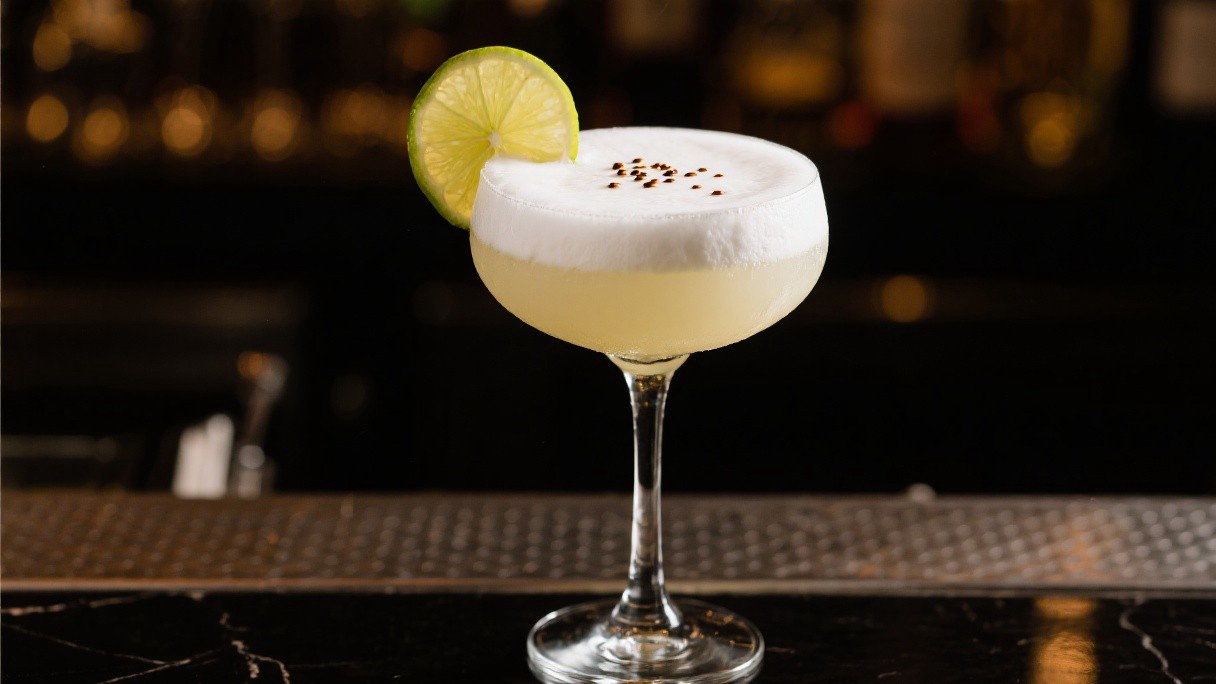
This comprehensive guide explores peruvian pisco sour, providing detailed instructions and expert techniques for achieving professional-quality results at home. Key topics covered include selecting the right pisco, the dry shake for egg white foam, simple syrup ratio and lime juice freshness, the bitters pattern and presentation. Selecting the Right Pisco Pisco is a grape brandy produced in Peru and Chile, and the Peruvian style is what is used in the authentic pisco sour. Peruvian pisco is distilled to proof and not aged in wood; it is clear and bottled at between 38 and 48 percent ABV. There are three main types: puro, made from a single grape variety; acholado, a blend of multiple varieties; and mosto verde, distilled from partially fermented grape must.
Read Details
March 17, 2026
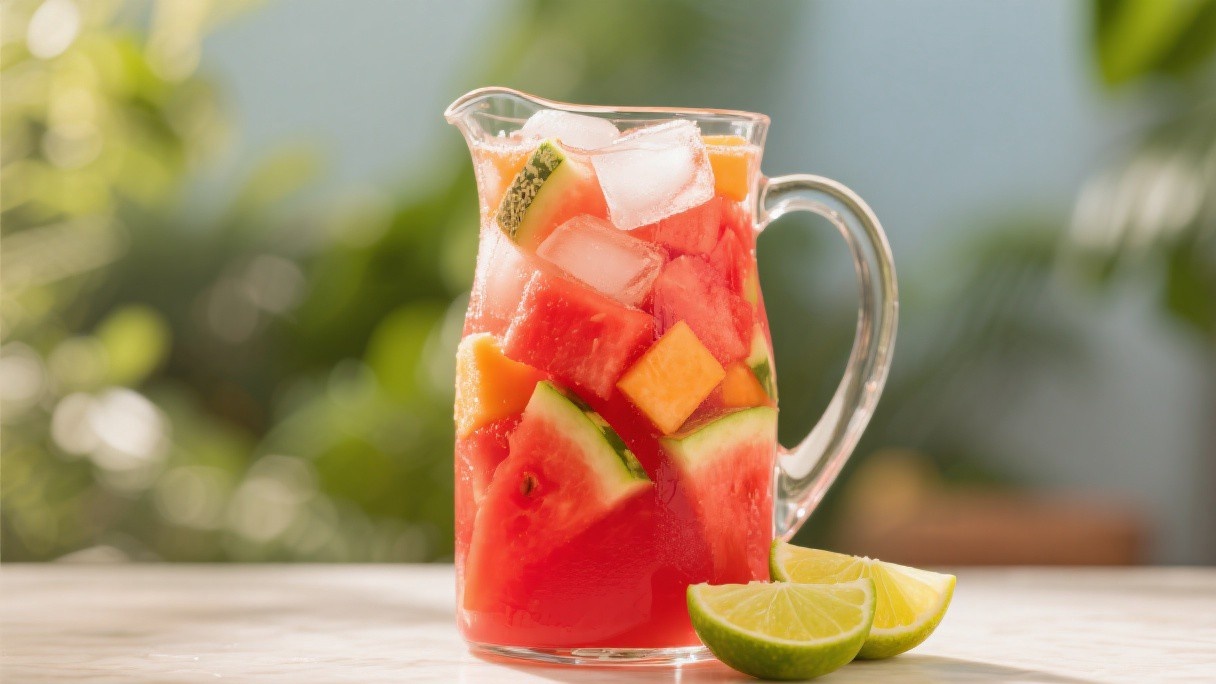
Mexican Agua Fresca: Fresh Fruit Water Recipes for Summer
Discover the complete process of mexican agua fresca with this in-depth guide covering essential techniques, key ingredients, and professional secrets. Key topics covered include watermelon agua fresca: the classic standard, cucumber and lime agua fresca, hibiscus agua de jamaica, cantaloupe and chile variation. Watermelon Agua Fresca: The Classic Standard Watermelon agua fresca is the most widely consumed version in Mexico, and it is the one I make most frequently at home. I use about 1.5 kilograms of seeded watermelon, cut into chunks, which yields roughly 1 liter of juice after blending and straining. The watermelon goes into a blender in batches and is pureed until completely smooth, then strained through a medium-mesh sieve to remove the pulp. Perfect for home cooks looking to expand their culinary skills and knowledge.
Read Details
March 15, 2026
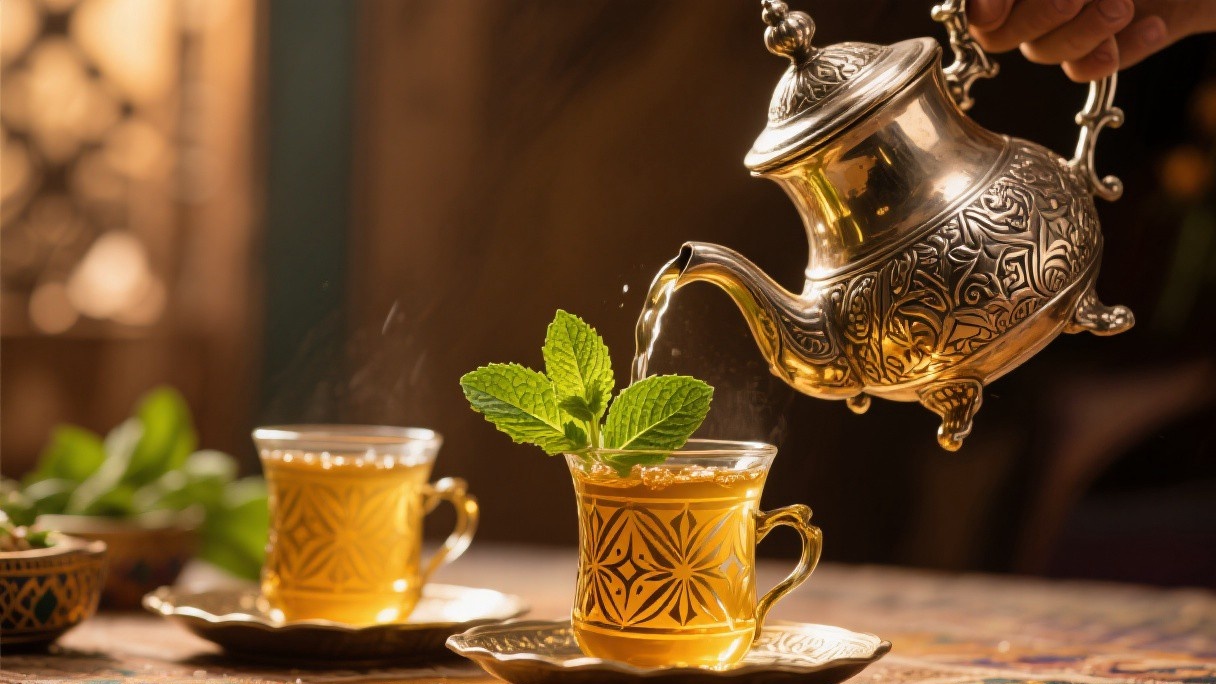
Moroccan Mint Tea: The Pouring Technique and Green Tea Base
Discover the complete process of moroccan mint tea with this in-depth guide covering essential techniques, key ingredients, and professional secrets. Key topics covered include choosing the right green tea base, the sugar and mint ratio, brewing and steeping time, the high pour and foam creation. Choosing the Right Green Tea Base Traditional Moroccan mint tea uses Chinese gunpowder green tea, which is rolled into small pellets that slowly unfurl during steeping. The pellets are tightly rolled and have a smoky, slightly astringent character that balances the sweetness of the sugar and the brightness of the mint. The tea should be rinsed first: I add a small amount of boiling water to the pellets, swirl for 5 seconds, and discard the water.
Read Details
March 13, 2026
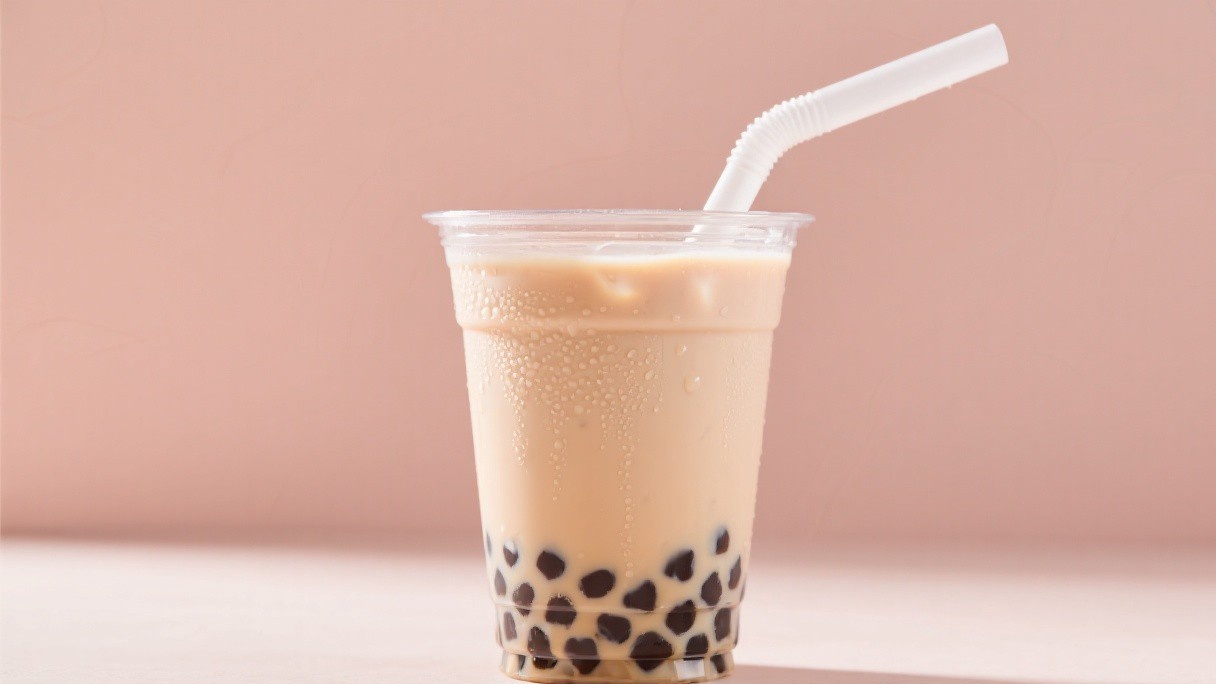
Taiwanese Bubble Tea: Tapioca Pearl Cooking and Milk Tea Base
Discover the complete process of taiwanese bubble tea with this in-depth guide covering essential techniques, key ingredients, and professional secrets. Key topics covered include cooking tapioca pearls to the right texture, the sugar coating that prevents sticking, brewing the tea base, assembling the milk tea. Cooking Tapioca Pearls to the Right Texture I use large black tapioca pearls, about 8 millimeters in diameter, which are made from tapioca starch and caramelized brown sugar. The cooking water must be at a rolling boil, at least 2 liters, before the pearls go in. A large volume of water prevents the pearls from sticking together and ensures even cooking. The cold water halts the cooking and firms the exterior of the pearls. Then I transfer them to a bowl and toss them with 2 tablespoons of brown sugar or honey. The sugar coating serves two purposes: it prevents the pearls from clumping together as they cool, and it adds a layer of sweetness that complements the milk tea.
Read Details
March 9, 2026
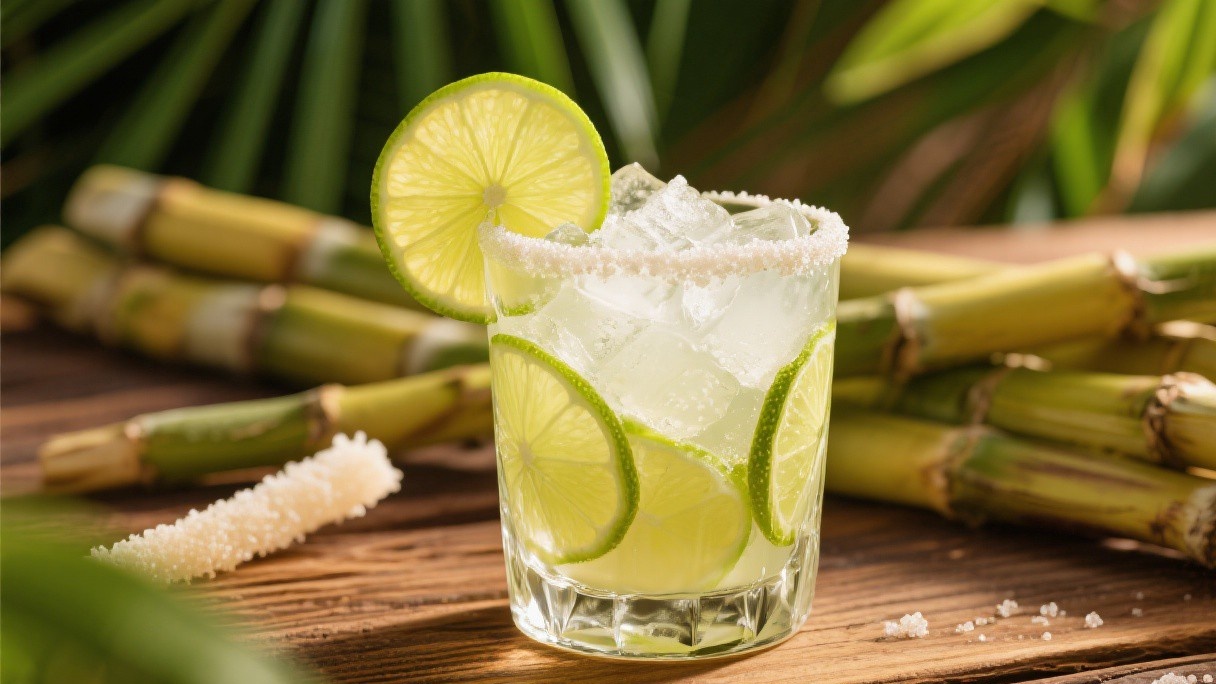
Brazilian Caipirinha: Cachaça, Lime, and Sugar in Perfect Balance
Master the art of brazilian caipirinha with this comprehensive guide featuring expert tips, essential techniques, and practical advice. Key topics covered include choosing between cachaça types, lime preparation: halves, not wedges, sugar choice and dissolution, building and serving the drink. Choosing Between Cachaça Types Cachaça is a distilled spirit made from fermented sugarcane juice, and it is fundamentally different from rum, which is typically made from molasses. There are two main categories: unaged cachaça branca, which is clear and bottled shortly after distillation, and aged cachaça amarela, which spends time in barrels of Brazilian wood such as amburana, jequitibá, or balsamo. For a classic caipirinha, I prefer an unaged cachaça because its raw, grassy character provides the most contrast with the sweet lime juice.
Read Details

March 8, 2026
Mastering Craft Cold Brew Coffee Techniques: A Complete Home Guide
Master the art of craft cold brew coffee techniques with this comprehensive guide featuring expert tips, essential techniques, and practical advice. Key topics covered include grind size and water temperature, the grind size matters, getting ratio right, steeping and filtering. Grind Size and Water Temperature Hot water extracts quickly but also pulls out bitter oils and acids that give coffee its harsh edge. Cold water takes 12-24 hours but selectively extracts sugars and acids, leaving behind much of the bitterness. This produces a concentrate that's naturally sweeter and smoother, with a creamy body hot methods can't match. Some prefer 1:4 for extra strength, others 1:8 for milder concentrate. Use filtered water for best flavor—chlorine and other impurities affect the final taste. Steeping and Filtering Combine grounds and cold water in a jar, stir to saturate all grounds, then cover and refrigerate.
Read Details

March 8, 2026
Italian Espresso: Dialing In Grind Size, Dose, and Extraction Time
This comprehensive guide explores italian espresso, providing detailed instructions and expert techniques for achieving professional-quality results at home. Key topics covered include the double shot standard: 18 grams in, 36 grams out, grind size and distribution, tamping pressure and technique, extraction temperature and pressure. The Double Shot Standard: 18 Grams In, 36 Grams Out The modern standard for a double espresso is 18 grams of ground coffee yielding 36 grams of liquid, extracted in 25 to 30 seconds. This 1:2 ratio provides a balanced extraction that captures the sweet and acidic compounds while leaving most of the bitter compounds behind. I use a calibrated digital scale that measures to 0.1 gram accuracy for both the dose and the yield. Perfect for home cooks looking to expand their culinary skills and knowledge.
Read Details
March 7, 2026
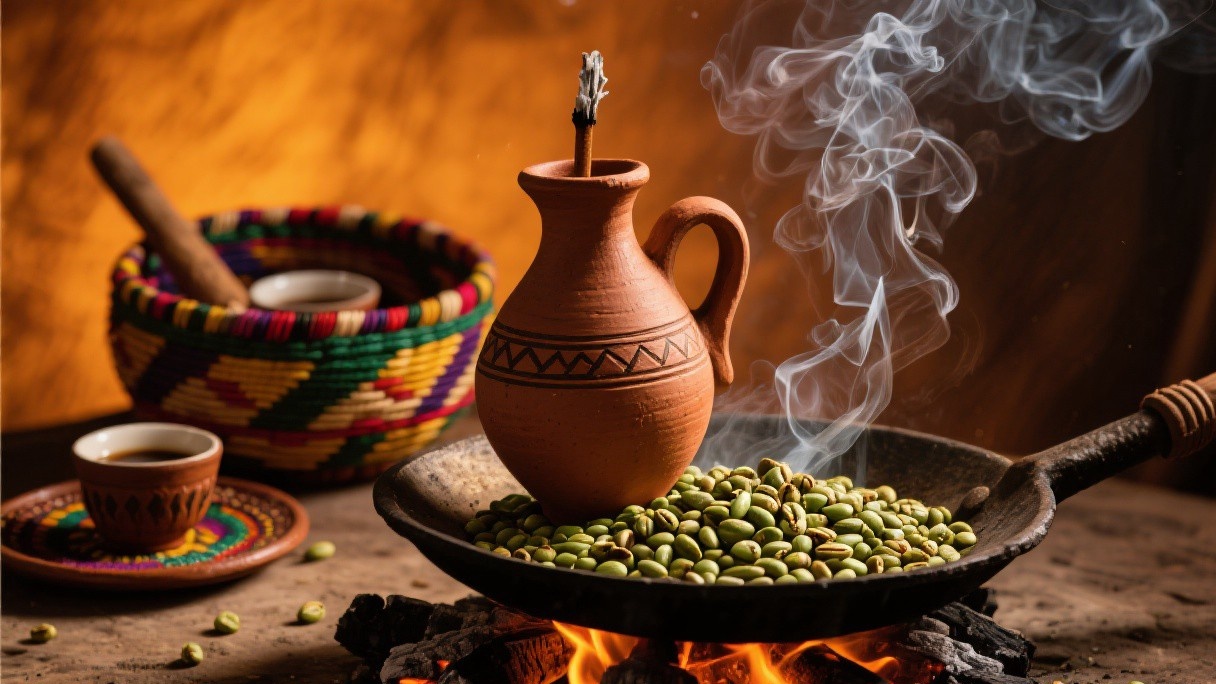
Ethiopian Coffee Ceremony: Traditional Roasting and Brewing Methods
This detailed article walks you through ethiopian coffee ceremony, from fundamental principles to advanced techniques used by professionals. Key topics covered include roasting green beans over charcoal, grinding by hand with a mortar and pestle, brewing in the jebena clay pot, the three rounds of serving. Roasting Green Beans Over Charcoal The ceremony begins with raw, green coffee beans that are washed and sorted by hand to remove any debris or defective beans. I watched as roughly 200 grams of green beans were placed in a long-handled, flat-bottomed pan called a menkeshkesh and held over a charcoal brazier. The roasting is done by shaking the pan continuously in a circular motion, which keeps the beans moving and promotes even coloring.
Read Details

March 7, 2026
Japanese Highball: The Whiskey and Soda Ratio That Changed Drinking
Learn how to master japanese highball with step-by-step instructions designed for home cooks seeking restaurant-quality results. Key topics covered include the whiskey selection and chill factor, carbonation and the two-pour method, ice selection and glass preparation, the ideal ratio and adjustments. The Whiskey Selection and Chill Factor Japanese highball bars typically use a blended whiskey, most commonly Suntory Kakubin, which has a light, malty profile with notes of grain, light oak, and a hint of citrus. Single malt whiskeys are generally considered too complex and assertive for a highball, as their nuanced flavors are overwhelmed by the soda. I keep a bottle of Kakubin or a similar Japanese blend in my freezer, because the whiskey should be as cold as possible when it enters the glass.
Read Details
March 5, 2026
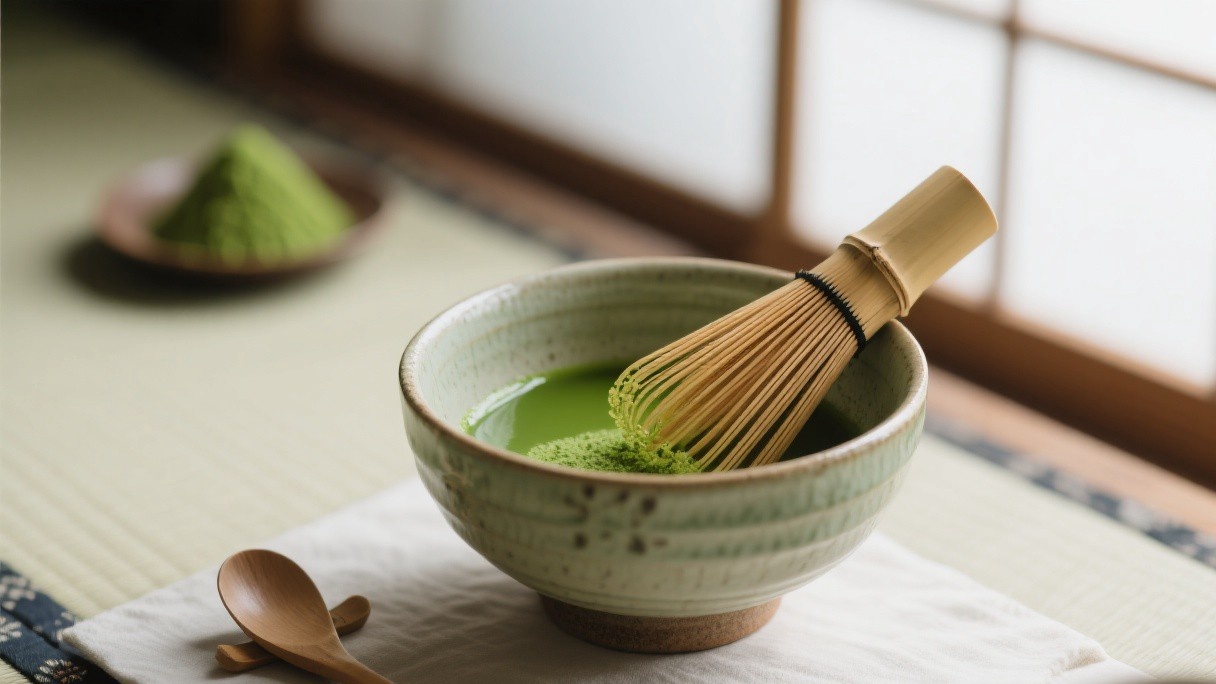
Traditional Matcha Preparation Methods: The Art of Japanese Green Tea
This comprehensive guide explores matcha preparation methods, providing detailed instructions and expert techniques for achieving professional-quality results at home. Key topics covered include the tools of preparation, water temperature critical, the whisking technique, daily practice. The Tools of Preparation Traditional matcha requires specific tools: a chawan (tea bowl), a chasen (bamboo whisk), and a chashaku (bamboo scoop). While not strictly necessary, these tools honor the tradition and produce better results. The chasen's tines create the froth essential to proper matcha, and quality whisks last years with proper care. With proper technique and quality matcha, the foam should last several minutes. Skipping the foam means drinking gritty matcha—not wrong, but missing the full experience. In our rushed world, that intentional pause makes matcha more than a caffeine delivery system—it becomes a small but meaningful act of mindfulness. The whisking motion, the gradual frothing, the careful temperature control—each step requires presence.
Read Details
March 4, 2026
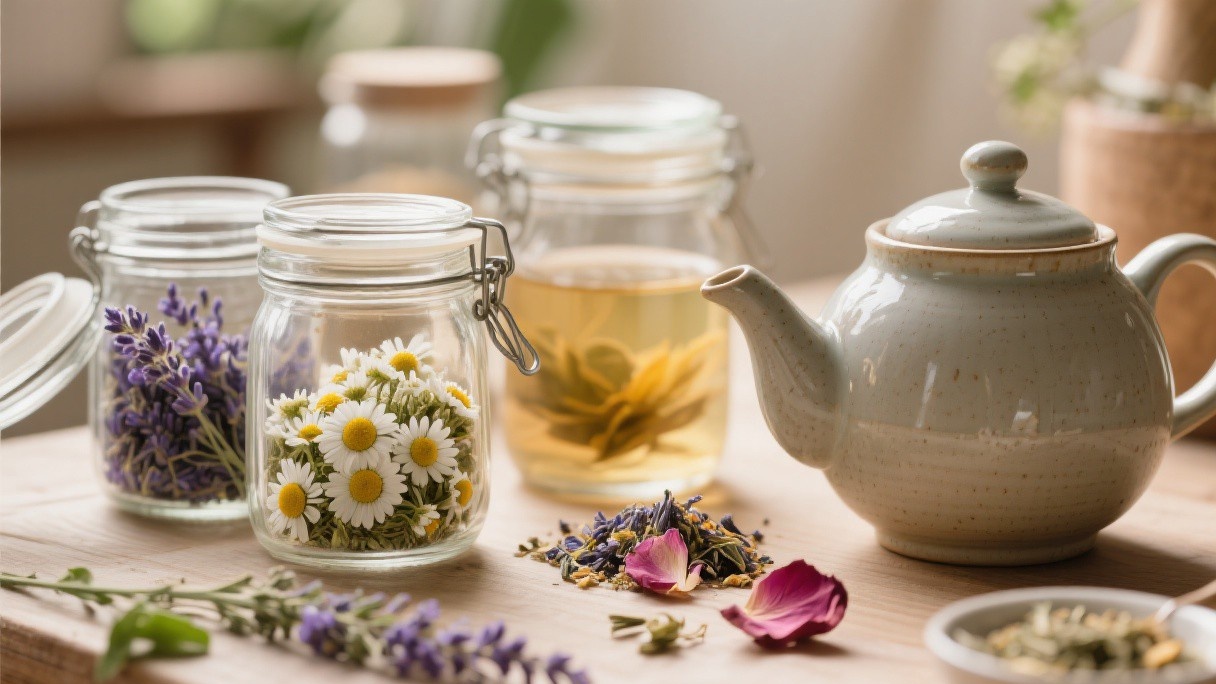
Herbal Tea Blending at Home: Creating Custom Botanical Wellness Blends
Discover the complete process of herbal tea blending at home with this in-depth guide covering essential techniques, key ingredients, and professional secrets. Key topics covered include dried herbs vs fresh herbs, the balancing act, functional blends, storage and freshness. Taste as you blend, brewing small samples rather than committing to large batches. Your palate evolves with experience, and perfect blending is always iterative. A focus blend could feature green tea (caffeine), ginkgo (circulation), and rosemary (memory). A digestion blend might include peppermint, ginger, and fennel. Storage and Freshness Dried herbs lose potency over time—use within a year for best flavor. Grind herbs just before brewing when possible for maximum aromatics. Blend for your exact needs, adjust for your specific taste, and enjoy tea as a personal expression of wellness and creativity. Building a Personal Tea Blend Creating a custom herbal tea blend follows a simple framework of base, accent, and bridge ingredients.
Read Details
March 4, 2026
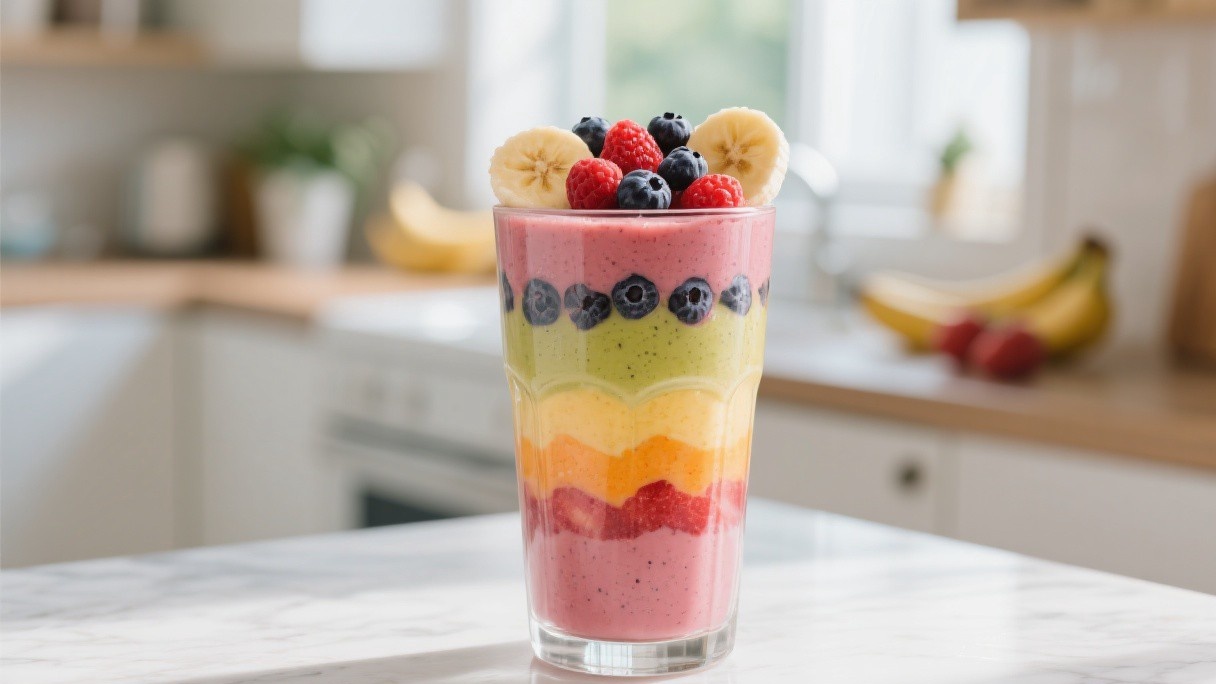
Fresh Fruit Smoothie Combinations: Nutritious Recipes for Every Palate
Learn how to master fruit smoothie combinations with step-by-step instructions designed for home cooks seeking restaurant-quality results. Key topics covered include the liquid foundation, understanding fruit categories, the frozen fruit advantage, adding nutrition boosters. Start with 1/2 to 1 cup of liquid per two cups of frozen fruit, adjusting based on desired thickness. Remember: frozen fruit needs less liquid than fresh. Understanding Fruit Categories Fruits fall into two categories that affect your smoothie. Tropical fruits (mango, papaya) contribute exotic flavor and enzymes. The best smoothies balance categories: typically one base, one accent, and one boosting ingredient. Stock up when fruit is on sale, peel and slice bananas, and freeze in portions for instant smoothie making. Adding Nutrition Boosters Transform a simple fruit smoothie into a meal replacement with strategic additions. Spinach or kale adds nutrients invisibly—your taste buds won't notice, but your body will thank.
Read Details
March 4, 2026
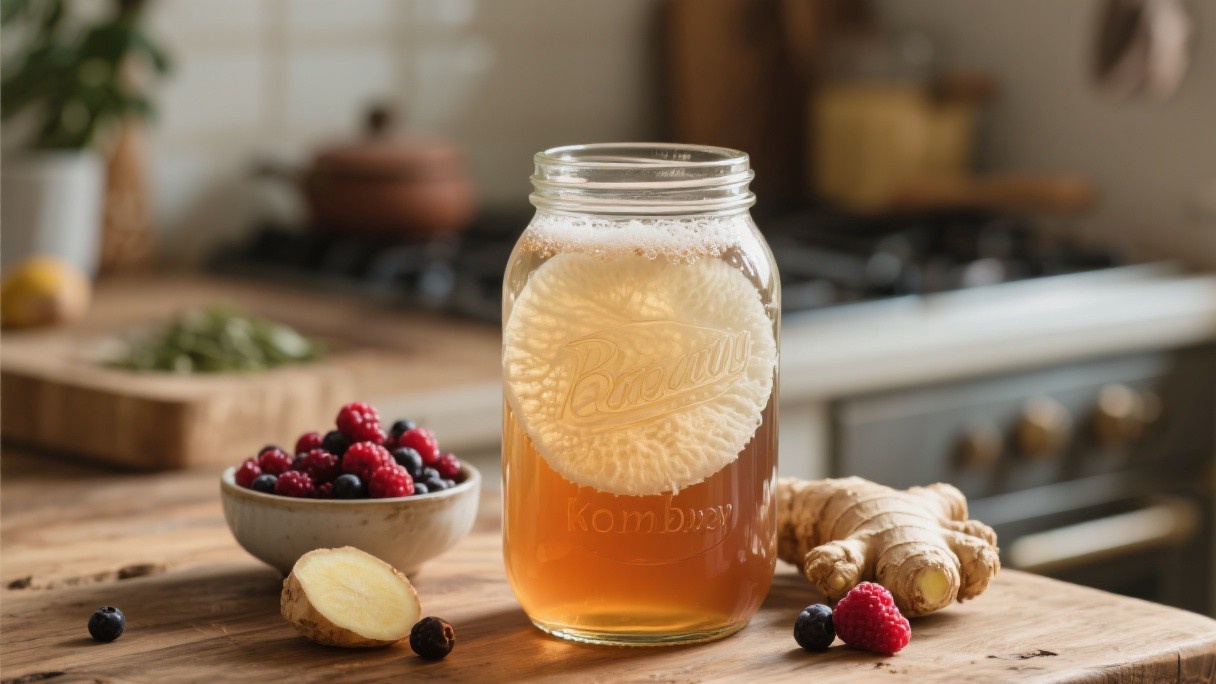
Homemade Kombucha Brewing Guide: From SCOBY to Delicious Fermented Tea
This detailed article walks you through kombucha brewing guide, from fundamental principles to advanced techniques used by professionals. Key topics covered include first fermentation timeline, the scoby: your living partner, first fermentation, second fermentation and flavoring. First Fermentation Timeline Kombucha transforms sweetened tea through a two-phase fermentation. First, the SCOBY consumes sugar and caffeine while producing organic acids, enzymes, and probiotics. Then, a second fermentation in sealed bottles with added flavors creates carbonation. Cover with breathable cloth and let ferment 7-14 days, depending on temperature and taste preference. Second Fermentation and Flavoring Bottle the kombucha, leaving 1-2 inches of headspace. Add flavoring: fruit puree, juice, ginger, herbs—get creative. Seal tightly and let carbonate for 2-3 days at room temperature. Refrigerate to stop fermentation and enjoy carbonated kombucha straight from the bottle. The process rewards patience and attention, producing a beverage far superior to commercial versions.
Read Details
March 2, 2026
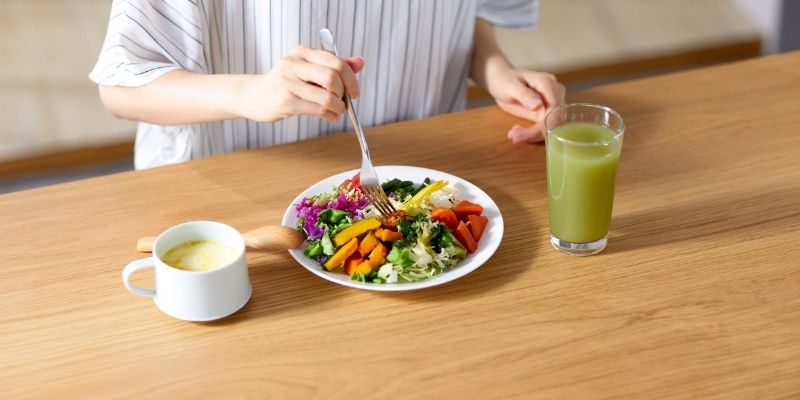
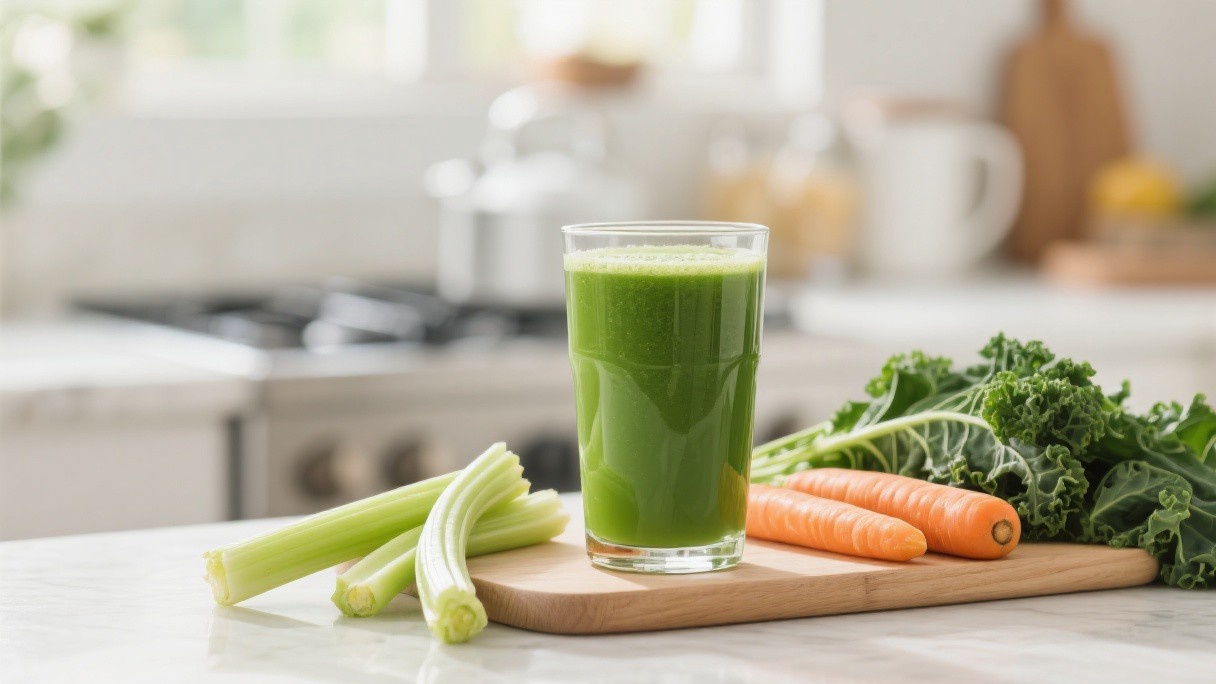
Fresh Vegetable Juice Recipes: Nutritious Blends for Health and Vitality
Master the art of vegetable juice recipes with this comprehensive guide featuring expert tips, essential techniques, and practical advice. Key topics covered include the juicer question: centrifugal vs. masticating, building balanced flavors, color-based nutrition, the ginger-lemon connection. Masticating Centrifugal juicers spin quickly and are ideal for hard vegetables and fruits; they create juice quickly but produce more foam and heat, which may degrade nutrients slightly. Masticating (cold-press) juicers operate slowly, extracting more juice and preserving nutrients longer. For serious juicing, invest in a quality masticating juicer—the yield difference alone pays for itself. Ginger adds warmth, digestive benefits, and a spicy complexity that makes otherwise harsh vegetables palatable. Lemon brightens everything, adding vitamin C and a clean finish. Start conservatively with ginger—it's potent—and adjust to your taste. Use organic produce when possible, especially for items you'll be juicing daily. Fresh vegetable juice isn't a meal replacement but a powerful supplement to an already healthy diet.
Read Details
February 26, 2026
Homemade Chai Spice Mixtures: Traditional Masala Blends for Authentic Flavor
This comprehensive guide explores chai spice mixtures, providing detailed instructions and expert techniques for achieving professional-quality results at home. Key topics covered include the essential spices, the spice ratios, the brewing method, regional variations. The Essential Spices Authentic chai spice starts with cardamom—the queen of Indian spices. Green cardamom pods crushed and added to tea provide that characteristic floral, citrusy note. Cinnamon adds warmth and sweetness; star anise contributes licorice complexity; cloves bring pungency and depth; black pepper adds the essential heat that distinguishes chai from mere spiced tea. The double-simmering extracts maximum flavor from both spices and tea. Regional Variations Kashmiri chai features pink color from salt and baking soda, with a milder spice profile. Each variation reflects local tastes and traditions while honoring the chai concept. The process itself—grinding, brewing, balancing—becomes meditation, and the result rewards patience with layers of complexity impossible to find in instant chai packets.
Read Details

February 26, 2026
Craft Cocktail Mixing Fundamentals: Essential Techniques for Home Bartenders
Learn how to master craft cocktail mixing fundamentals with step-by-step instructions designed for home cooks seeking restaurant-quality results. Key topics covered include the building method, the stirring method, the shaking method, the floating technique. The Building Method The simplest technique, building means adding ingredients directly to the serving glass (usually over ice) and stirring. The Stirring Method Clear, spirit-forward cocktails like Manhattans, Martinis, and Negronis need stirring, not shaking. Stirring chills the drink while preserving clarity and texture—you want dilution without aeration. Fill a shaker tin with ice, add ingredients, seal, and shake vigorously for 10-15 seconds. The vigorous shaking chills rapidly and adds dilution while incorporating air for a frothy texture. Double-strain when using egg whites or citrus to ensure smooth service. The Floating Technique Floating means gently pouring an ingredient on top of the drink without mixing. This creates beautiful layers—think pousse-café or elaborate garnishing.
Read Details

February 19, 2026
Artisanal Hot Chocolate Variations: Global Recipes for Luxurious Drinking Chocolate
Discover artisanal hot chocolate recipes from around the world, from thick Spanish drinking chocolate to Mexican spiced versions with cinnamon and chili. This global exploration covers the essential techniques for creating luxurious, velvety drinking chocolate at home. Learn how different chocolate types affect flavor and texture, from single-origin dark chocolate to traditional Mexican tablets. The article examines variations including Italian cioccolata densa, French chocolat chaud, and South American styles with unique spice additions. Master the critical temperature control needed to achieve perfect consistency without scorching. Understand how milk fat percentage, chocolate quality, and whisking technique influence the final cup. Whether you prefer intensely dark, milk chocolate sweetness, or spiced complexity, these artisanal variations will elevate your hot chocolate experience beyond ordinary cocoa mixes.
Read Details
February 17, 2026
Homemade Lemonade with Herb Infusions: Botanical Recipes for Refreshing Summer Drinks
Discover the complete process of lemonade with herb infusions with this in-depth guide covering essential techniques, key ingredients, and professional secrets. Key topics covered include the simple syrup base, lavender: sweet and floral, mint: classic and cooling, basil: unexpected sophistication. The Simple Syrup Base Herb infusion begins with simple syrup: equal parts sugar and water, heated until dissolved. While still hot, add your herbs and let steep until flavorful, typically 30 minutes to several hours depending on herb intensity. This base keeps for weeks and transforms ordinary lemonade into something special. Use a combination of spearmint (sweet) and peppermint (strong) for complexity. Add mint to the syrup while still warm, or muddle fresh leaves directly in the glass for a more vibrant, immediate mint flavor. Basil: Unexpected Sophistication Basil and lemon seem made for each other—both bright and aromatic, they elevate rather than compete.
Read Details