Dessert
March 28, 2026
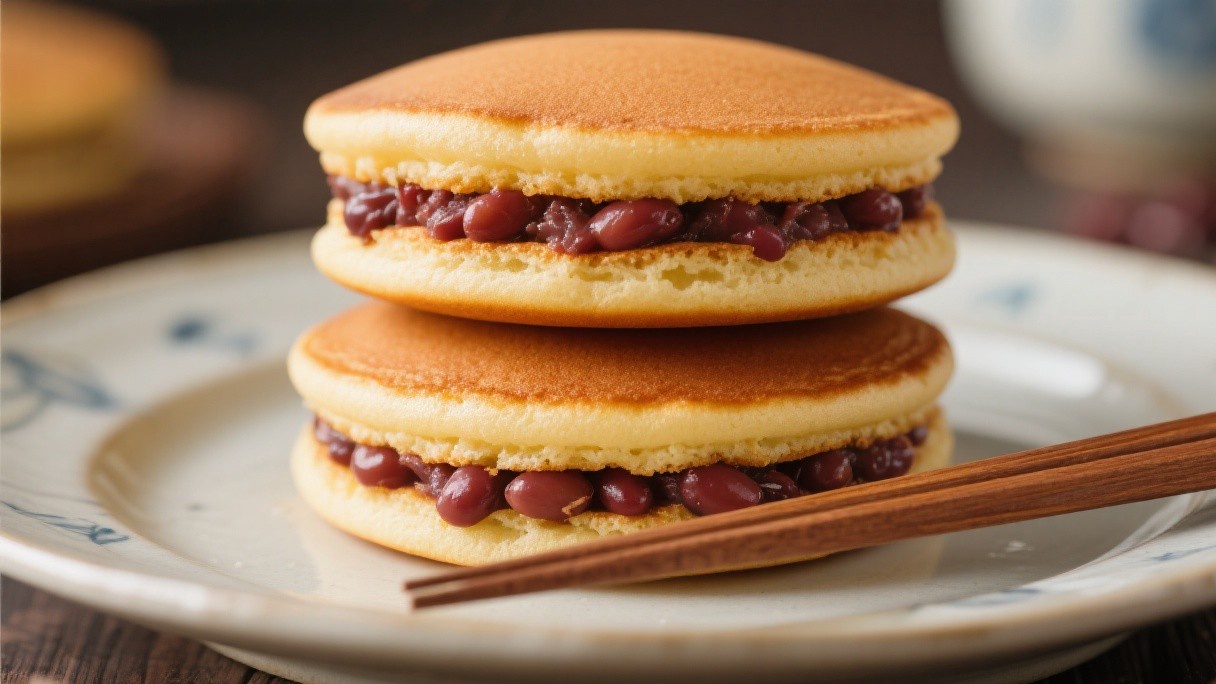
Japanese Dorayaki: Red Bean Pancake Sandwiches
This comprehensive guide explores japanese dorayaki, providing detailed instructions and expert techniques for achieving professional-quality results at home. Key topics covered include the batter: eggs, sugar, and honey, cooking the pancakes on low heat, making the red bean filling, assembling the dorayaki. I first encountered dorayaki through the popular Japanese character Doraemon, whose favorite food it is, and I was surprised to discover that the homemade version is significantly better than the packaged ones available in Asian grocery stores. The pancakes should be soft, pillowy, and faintly sweet, providing a neutral base that lets the red bean filling be the star. The Batter: Eggs, Sugar, and Honey I whisk together 2 large eggs and 80 grams of granulated sugar in a bowl for about 5 minutes until the mixture is pale, thick, and has doubled in volume.
Read Details
March 20, 2026
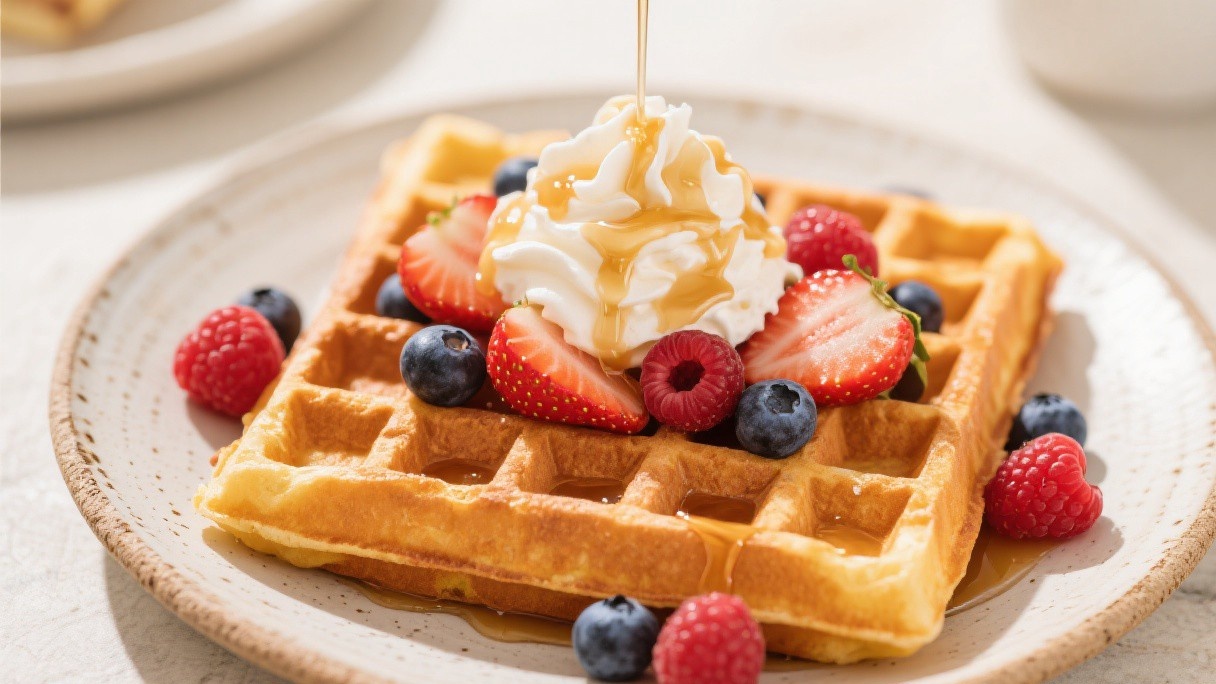
Belgian Waffles: Yeast vs Liege Style with Pearl Sugar
This comprehensive guide explores belgian waffles, providing detailed instructions and expert techniques for achieving professional-quality results at home. Key topics covered include brussels waffle: yeast-leavened batter, liege waffle: brioche-style dough, pearl sugar and its caramelization, cooking temperature and timing. The Brussels waffle is a breakfast item served with toppings, while the Liege waffle is a street food, meant to be eaten plain, warm from the iron, with no accompaniment needed. Brussels Waffle: Yeast-Leavened Batter The Brussels waffle batter is yeast-leavened, which gives it a light, airy interior and a crisp exterior. I dissolve 7 grams of active dry yeast in 125 milliliters of warm milk, about 37 degrees Celsius, and let it sit for 5 minutes until foamy. Whether you are a beginner or experienced cook, this guide provides valuable insights for success.
Read Details
March 18, 2026
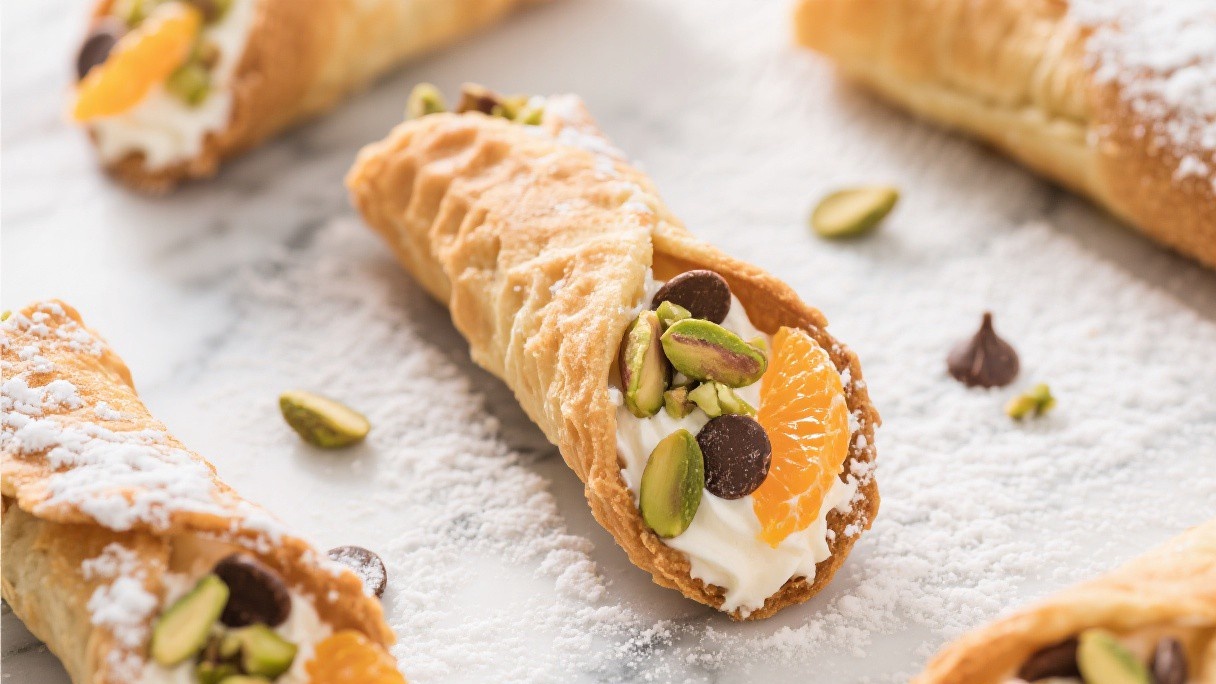
Italian Cannoli: Crispy Shells and Sweet Ricotta Filling
This detailed article walks you through italian cannoli, from fundamental principles to advanced techniques used by professionals. Key topics covered include making the shell dough with wine and vinegar, rolling and frying the shells, draining and sweetening the ricotta, filling and garnishing. I learned this rule the hard way after making a batch of pre-filled cannoli for a party, only to find that by the time guests arrived, the shells had absorbed moisture from the ricotta and become soft and chewy. Since then, I always fill cannoli immediately before serving, and the difference in quality is dramatic. Making the Shell Dough with Wine and Vinegar Cannoli dough is a simple mixture of flour, fat, sugar, and a small amount of acid that tenderizes the gluten.
Read Details
March 16, 2026
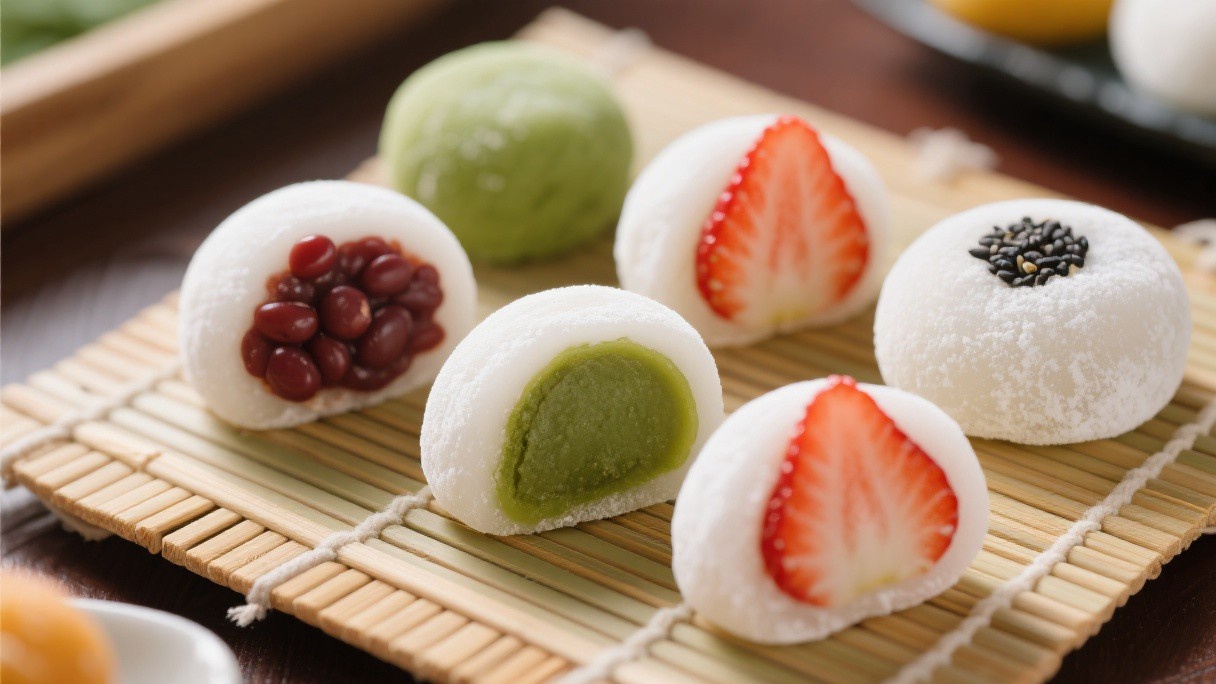
Japanese Mochi: Glutinous Rice Pounding and Sweet Fillings
This detailed article walks you through japanese mochi, from fundamental principles to advanced techniques used by professionals. Key topics covered include soaking and steaming glutinous rice, pounding with a stand mixer, preparing sweet red bean paste, shaping daifuku: filled mochi. The finished mochi dough can be shaped, filled, or colored, and it serves as the base for dozens of Japanese sweets, from simple plain mochi to elaborate filled confections called daifuku. Soaking and Steaming Glutinous Rice I use 500 grams of short-grain glutinous rice, which is different from regular Japanese sushi rice. Glutinous rice contains almost no amylose and is composed almost entirely of amylopectin, which gives it its characteristic stickiness. Ideal for food enthusiasts seeking to master new techniques and elevate their cooking.
Read Details
March 16, 2026
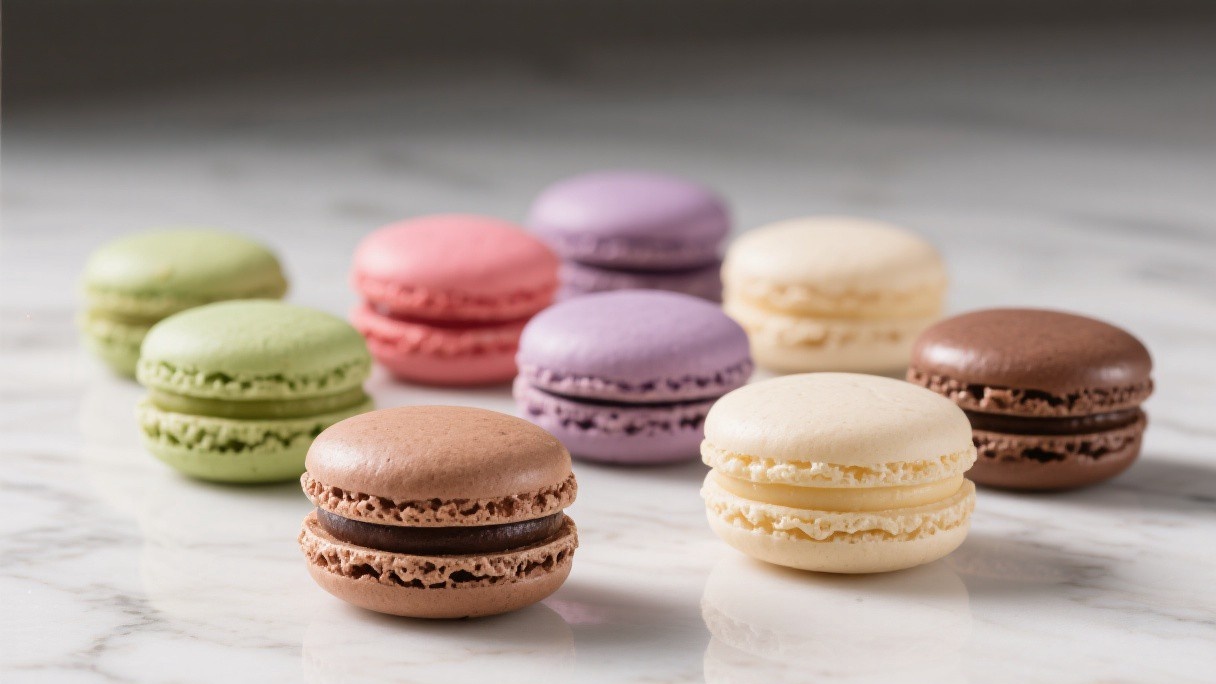
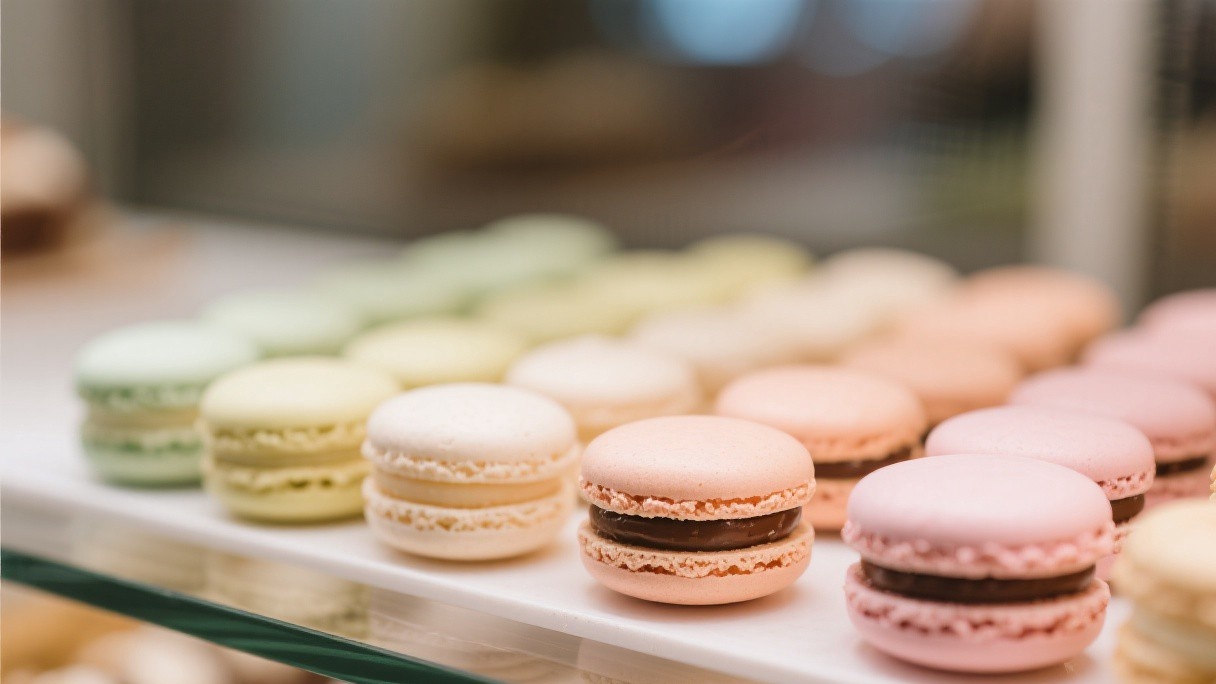
French Macaron: Italian vs Swiss Meringue Methods Compared
This detailed article walks you through french macaron, from fundamental principles to advanced techniques used by professionals. Key topics covered include the italian meringue method, the swiss meringue method, macaronage: the critical folding step, resting and baking conditions. Both methods produce the same basic shell, a crisp exterior with a chewy interior and the characteristic ruffled foot, but they differ in stability, ease of execution, and the texture of the finished macaron. The Italian Meringue Method In the Italian method, a sugar syrup heated to 118 degrees Celsius is poured in a thin stream into egg whites that have been whipped to soft peaks. The hot sugar cooks the whites as it incorporates, producing a meringue that is more stable and less prone to deflation.
Read Details
March 15, 2026
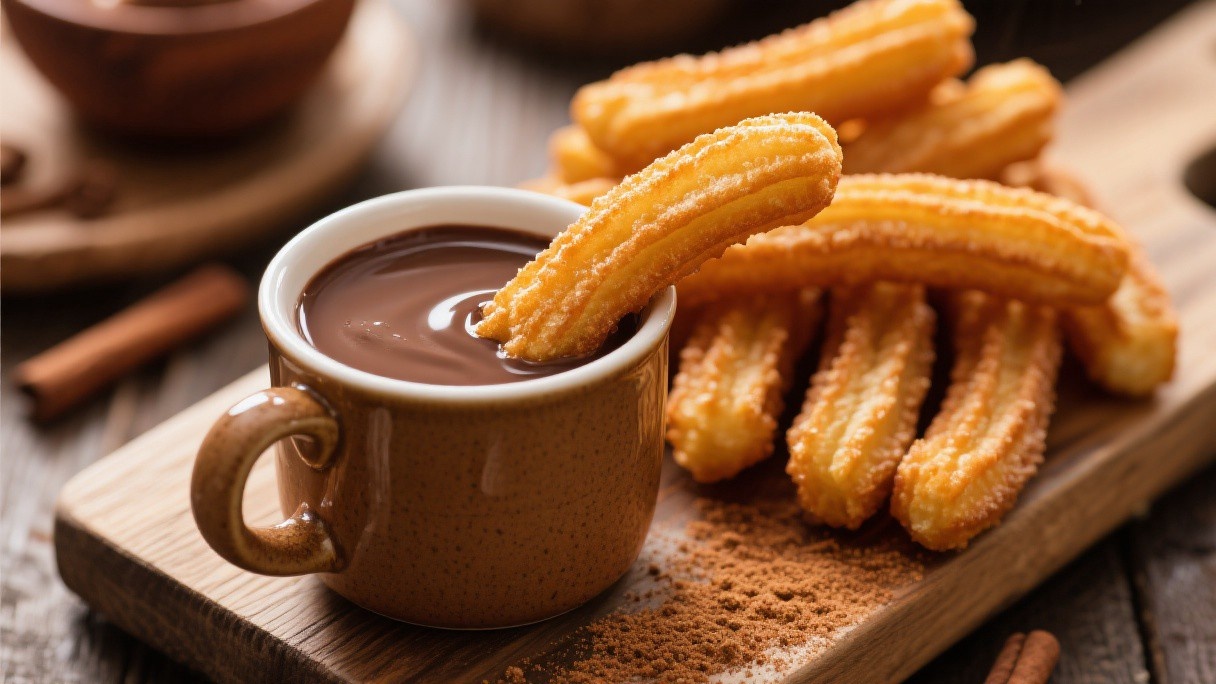
Spanish Churros: Fried Dough Batter and Thick Hot Chocolate
This comprehensive guide explores spanish churros, providing detailed instructions and expert techniques for achieving professional-quality results at home. Key topics covered include the dough: flour, water, and salt, frying temperature and technique, the thick hot chocolate for dipping, piping consistency and common problems. They are served plain, without sugar or cinnamon, alongside a cup of thick, pudding-like hot chocolate for dipping. I ate churros at the Chocolatería San Ginés in Madrid, and the experience of dragging a freshly fried, slightly salty churro through a cup of dense, dark chocolate is remarkably satisfying dessert combinations I have encountered. The Dough: Flour, Water, and Salt Spanish churro dough contains no butter, no eggs, and no sugar, which is what distinguishes it from the choux pastry used for cream puffs.
Read Details
March 14, 2026
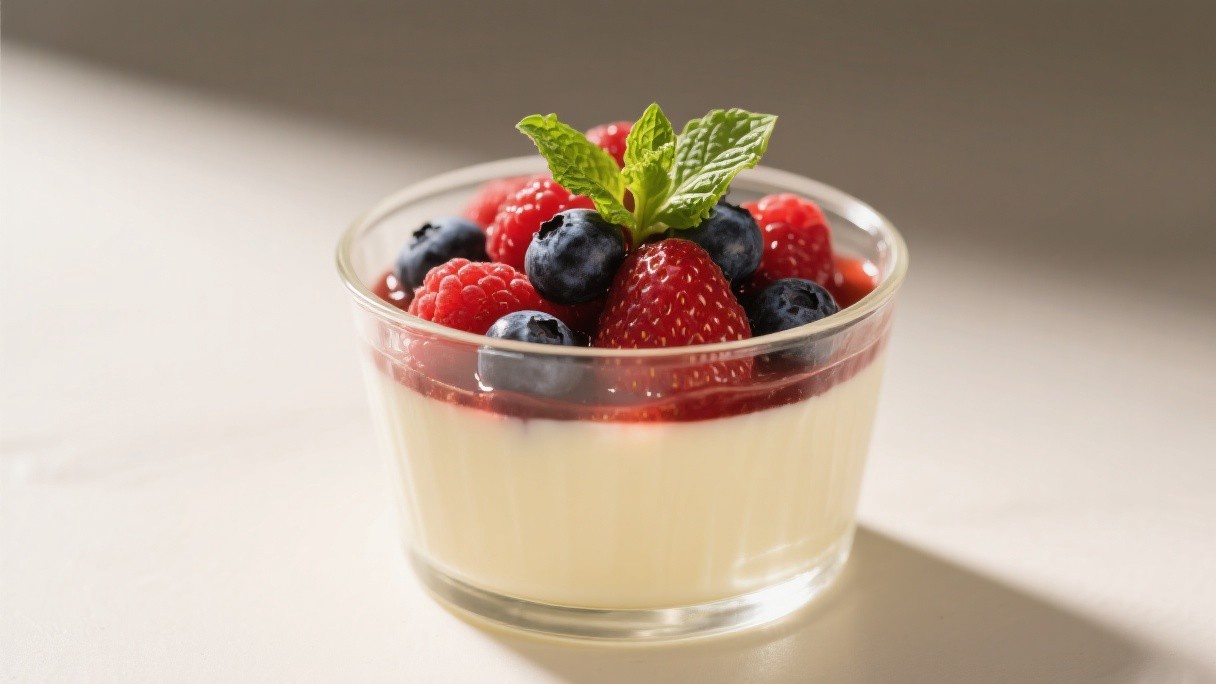
Italian Panna Cotta: Cream Gelatin Setting and Berry Compote
This detailed article walks you through italian panna cotta, from fundamental principles to advanced techniques used by professionals. Key topics covered include the gelatin-to-cream ratio, flavoring with vanilla and citrus, molding and setting time, unmolding without damage. I have found that the most common mistake in panna cotta preparation is using too much gelatin, which produces a rubbery, gummy texture that is closer to Jell-O than to the delicate Italian original. Getting the gelatin ratio right is the most important technical consideration in the entire recipe. The Gelatin-to-Cream Ratio I use 2.5 grams of powdered gelatin per 100 milliliters of liquid, which produces a soft set that trembles when the mold is shaken. Whether you are a beginner or experienced cook, this guide provides valuable insights for success.
Read Details
March 11, 2026
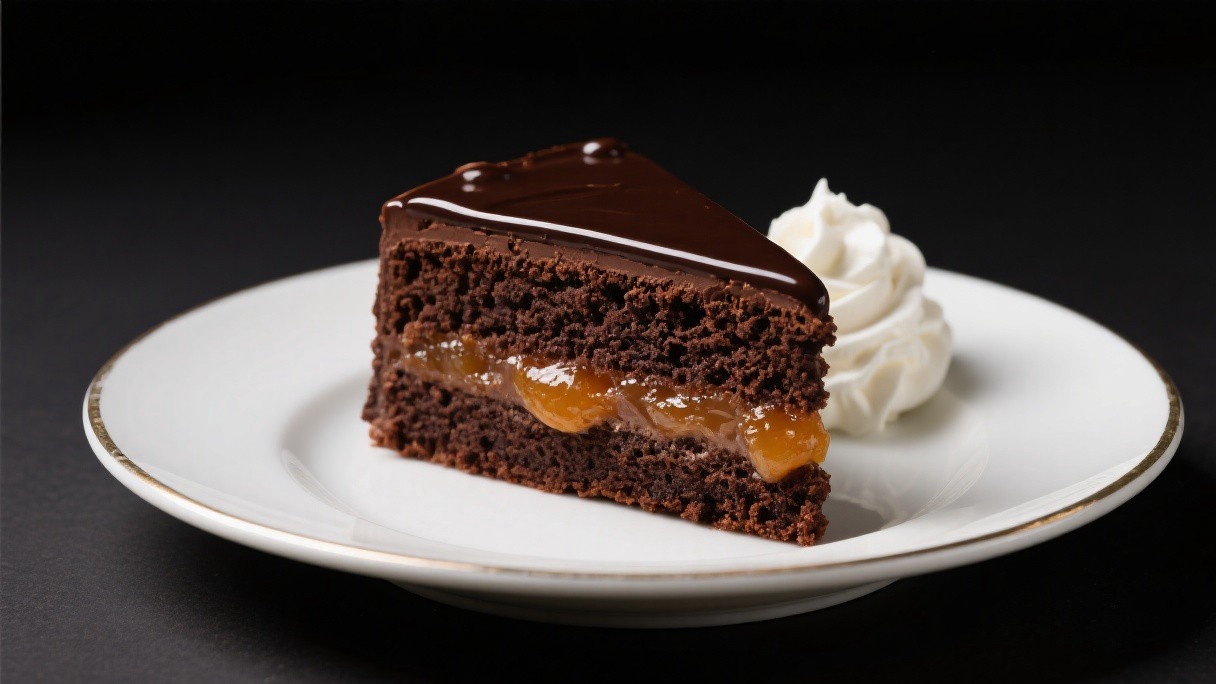
Austrian Sachertorte: The Original Chocolate Apricot Layer Cake
Master the art of austrian sachertorte with this comprehensive guide featuring expert tips, essential techniques, and practical advice. Key topics covered include the sponge: egg yolk foam and melted chocolate, baking temperature and the center crack, the apricot jam glaze layer, the chocolate glaze and pouring technique. Reproducing it at home requires precision in the cake batter, which relies on beaten egg yolks for lift rather than chemical leavening, and a glaze that must be poured at the correct temperature to achieve a smooth, mirror-like finish. The Sponge: Egg Yolk Foam and Melted Chocolate The Sachertorte sponge is a type of Viennese sponge cake that uses separated eggs. I beat 6 egg yolks with 100 grams of granulated sugar on high speed for about 8 minutes until the mixture is pale, thick, and has tripled in volume.
Read Details
March 9, 2026
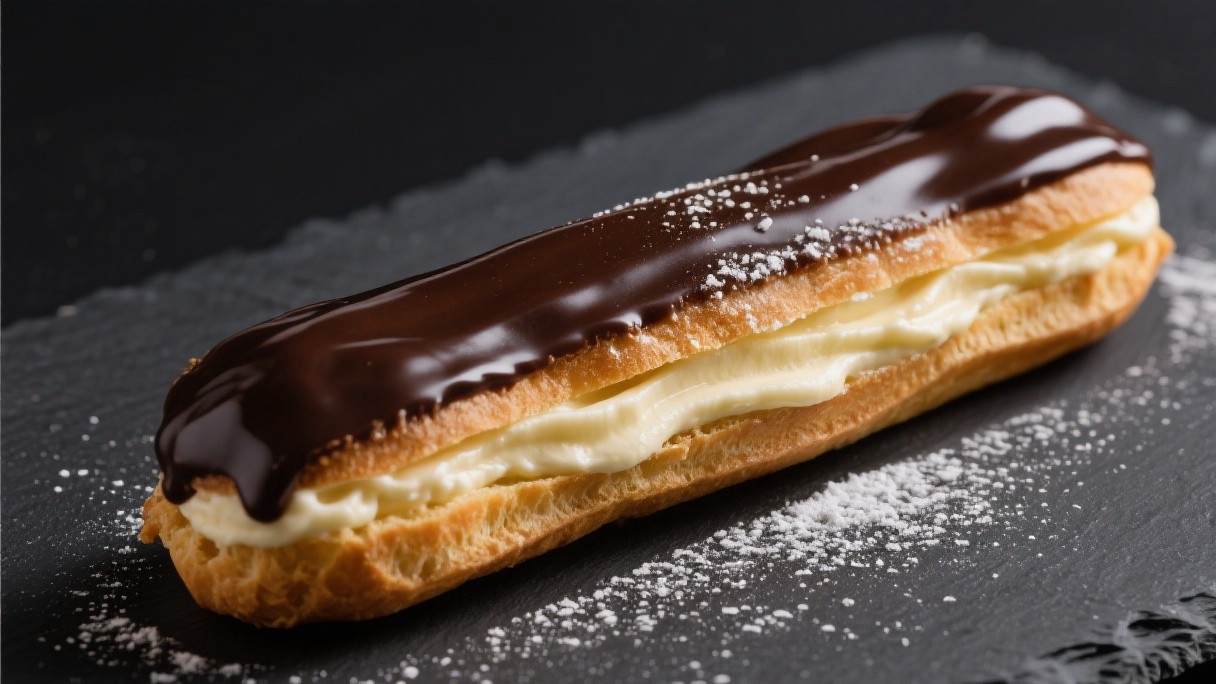
French Éclair: Choux Pastry, Custard Filling, and Chocolate Glaze
This detailed article walks you through french éclair, from fundamental principles to advanced techniques used by professionals. Key topics covered include making choux pastry with proper hydration, incorporating eggs for the right consistency, piping and baking for maximum rise, preparing crème pâtissière. The pastry must sound hollow when tapped to confirm it is fully dried through. Making Choux Pastry with Proper Hydration Choux pastry is cooked twice: first on the stove to form a dough, and then in the oven to puff and set. I bring 250 milliliters of water, 100 grams of unsalted butter cut into small pieces, 1 teaspoon of sugar, and half a teaspoon of salt to a boil in a medium saucepan. An essential resource for achieving professional-quality results in your own kitchen.
Read Details
February 27, 2026
Master Classic French Macaron Techniques: The Science Behind Perfect Shells
Discover the complete process of classic french macaron techniques with this in-depth guide covering essential techniques, key ingredients, and professional secrets. Key topics covered include achieving the right batter consistency, the critical rest, temperature and timing, the tasting test. Achieving the Right Batter Consistency Macaronage—the process of folding almond flour mixture into whipped egg whites—is where macaron success is determined. Undermixing creates peaked mounds with no feet; overmixing creates flat discs that spread. The perfect batter flows like molten lava when dropped, and the peaks slowly settle back into smooth surface within 10 seconds. The entire process—resting, baking, cooling—must be respected; rushing any step compromises results. The Tasting Test Perfect macarons have crisp shells that give way to a chewy interior—not soft or gooey, but with a slight resistance. Between the shells, a thin layer of ganache or buttercream adds richness without overwhelming.
Read Details
February 27, 2026
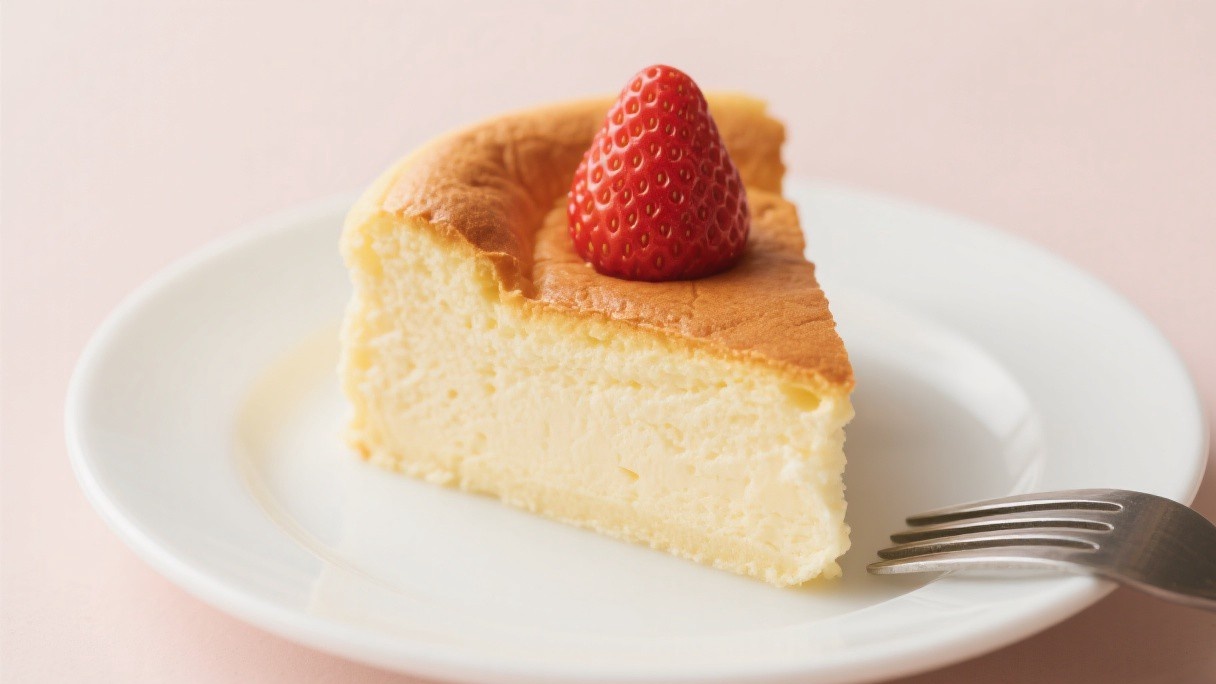
Japanese Cheesecake (Soufflé): Cotton-Soft Texture Through Meringue Folding
Learn how to master japanese cheesecake (soufflé) with step-by-step instructions designed for home cooks seeking restaurant-quality results. Key topics covered include cream cheese and egg yolk base, whipping the meringue to stiff peaks, the folding technique that preserves volume, water bath baking method. The lift comes from a stiff meringue that is folded into the cream cheese batter, and the technique of folding is the single most critical step in the entire recipe. I have made this cheesecake dozens of times, and the difference between a perfect one and a collapsed one always comes down to how the meringue is incorporated. Cream Cheese and Egg Yolk Base I start with 225 grams of full-fat cream cheese, 60 grams of unsalted butter, and 100 milliliters of whole milk.
Read Details
February 26, 2026
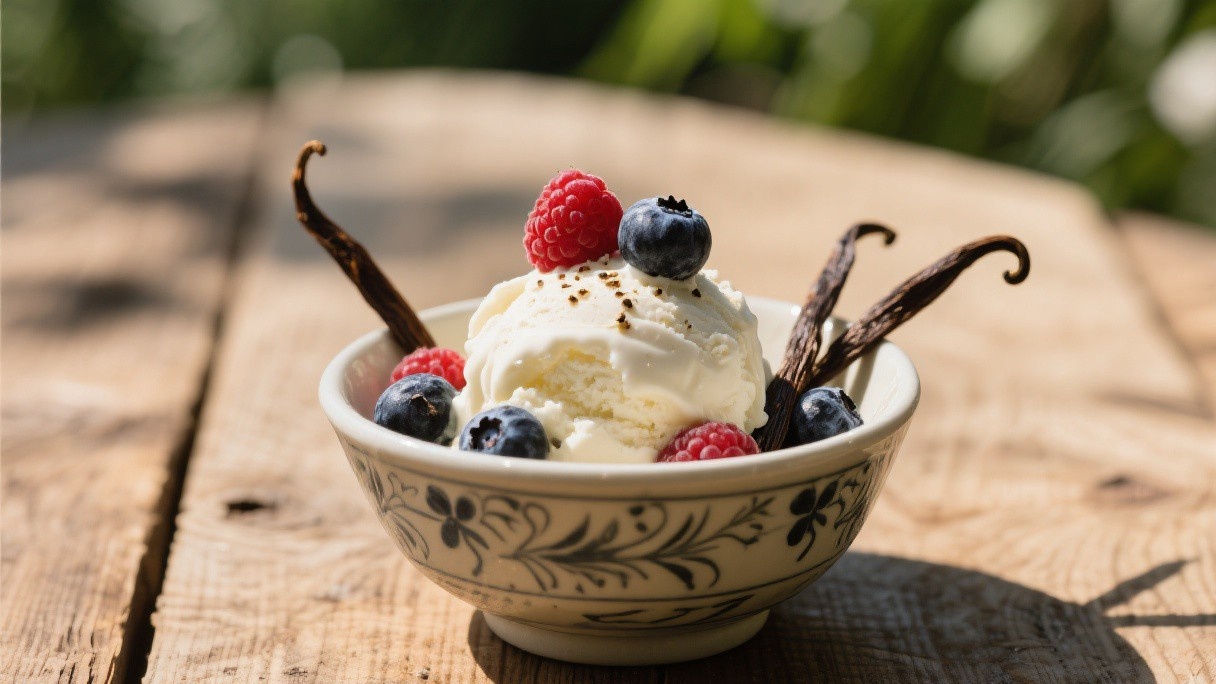
Creamy Homemade Ice Cream Without a Machine: The Science of No-Churn Success
Discover the complete process of creamy homemade ice cream without a machine with this in-depth guide covering essential techniques, key ingredients, and professional secrets. Key topics covered include the no-churn science, whipping cream fundamentals, folding technique, flavor infusions and add-ins. The No-Churn Science Traditional ice cream relies on constant agitation during freezing to incorporate air and prevent large ice crystals. No-churn ice cream skips the churn by using sweetened condensed milk (which stays liquid at freezing temperatures) and whipped cream (which provides the creamy body). Whipping Cream Fundamentals Heavy whipping cream must be cold when whipped—straight from the refrigerator. Flavor Infusions and Add-Ins No-churn ice cream accepts endless variations. Steep vanilla beans in warm cream before condensing; swirl in fruit purees or chocolate sauce; fold in crushed cookies or chopped candy; add cocoa powder for chocolate. For best texture, fold in add-ins during the final folding stage, preserving the whipped structure.
Read Details
February 24, 2026
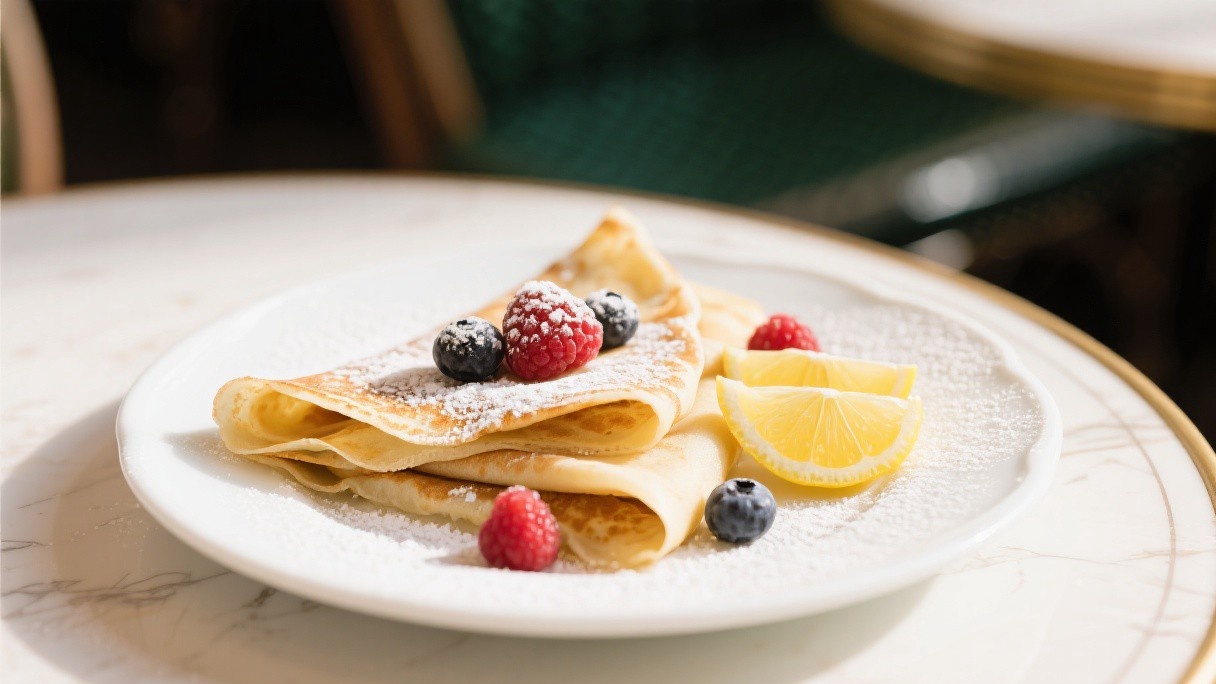
French Crepe Batter Mastery: The Art of Creating Perfectly Thin, Tender Crepes
This detailed article walks you through french crepe batter mastery, from fundamental principles to advanced techniques used by professionals. Key topics covered include the essential rest, the pan and temperature, the pouring technique, the flip. The Essential Rest Crepe batter needs time to hydrate fully. Resting allows flour particles to absorb liquid and gluten to relax, resulting in more tender, pliable crepes. Refrigerate batter for at least 1 hour, preferably overnight. Use just enough batter to coat—too much creates thick, rubbery crepes. The ideal is translucent thinness where you can almost read through it. The Flip Wait until edges lift and the surface appears dry (about 1 minute). Flip with a sharp spatula and cook 30 seconds on the second side. Stack finished crepes on a plate—they'll stick together slightly, which is traditional for serving. For dessert, fill with Nutella, fresh fruit, or simple sugar and lemon.
Read Details
February 23, 2026
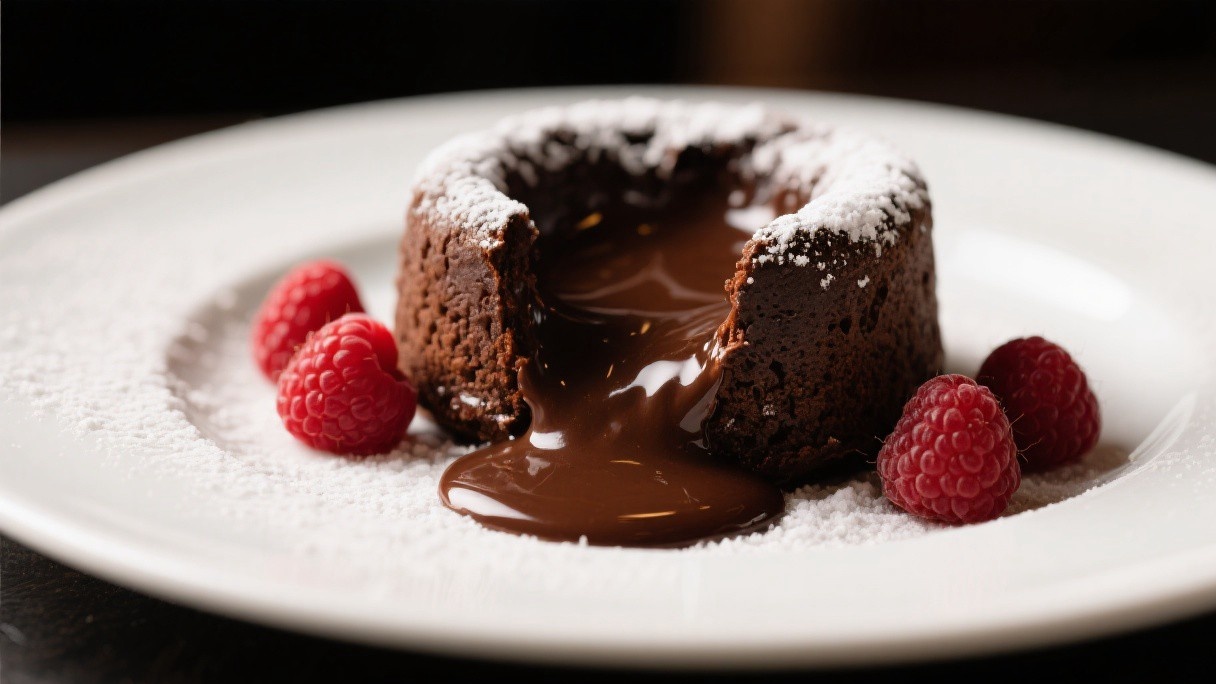
Molten Lava Cake Timing Precision: Mastering the Perfect Gooey Chocolate Center
Master the art of molten lava cake timing precision with this comprehensive guide featuring expert tips, essential techniques, and practical advice. Key topics covered include the science of molten centers, temperature and timing relationship, ramekin preparation, the unmolding moment. The Science of Molten Centers The molten center isn't undercooked—it's precisely cooked to the exact temperature where chocolate and butter melt but egg proteins haven't yet coagulated. That temperature window is narrow: around 130-140°F for the center versus 160°F+ for setting. Oven temperature and baking time must be calibrated to achieve this differential. Refrigerate prepared ramekins until needed; cold butter solidifies, providing extra release insurance. The Unmolding Moment Let cakes rest 1 minute after removing from oven—internal pressure decreases slightly, making unmolding safer. Run a thin knife around edges, place plate on top, invert firmly but smoothly, and lift ramekin. If it doesn't release immediately, let it sit 30 seconds more.
Read Details
February 20, 2026
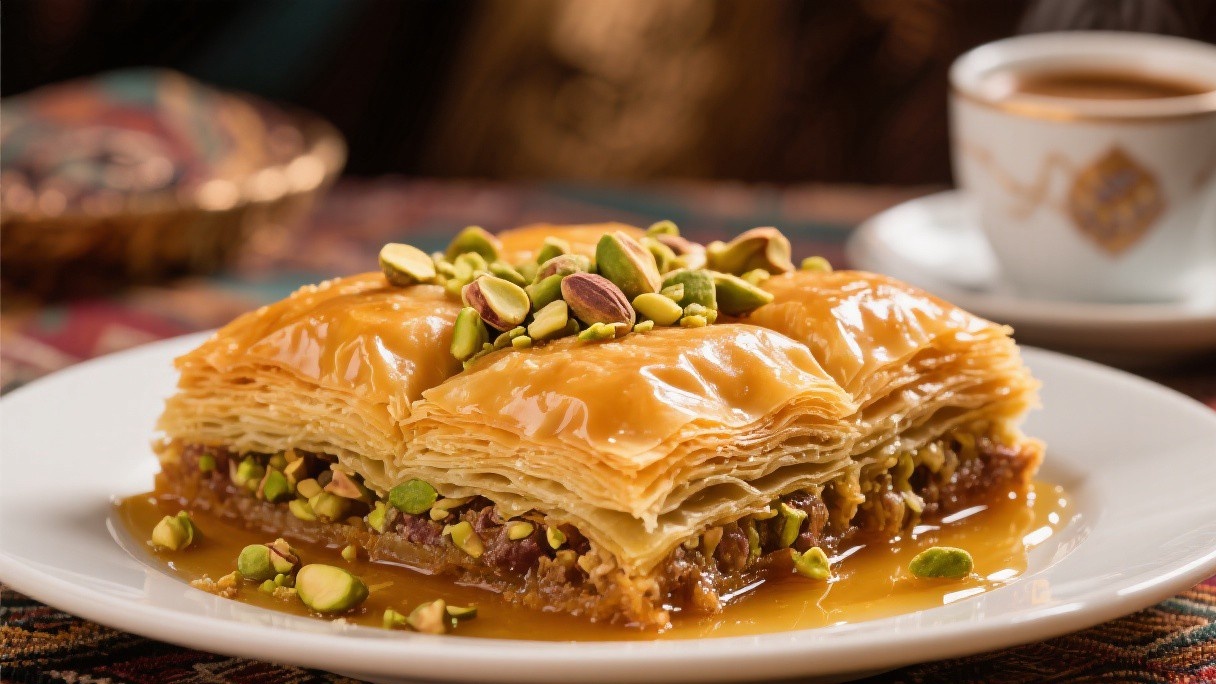
Authentic Baklava Layering Methods: Mastering Traditional Phyllo Pastry Techniques
This comprehensive guide explores baklava layering methods, providing detailed instructions and expert techniques for achieving professional-quality results at home. Key topics covered include working with phyllo, the layering count, nut filling distribution, the syrup: temperature and timing. Working with Phyllo Phyllo dough is unforgiving—it dries out quickly and tears easily. Brush each sheet with melted butter generously but evenly; this creates the flaky separation essential to good baklava. The Layering Count Traditional baklava uses at least 20-30 sheets of phyllo, more is better. Walnuts, pistachios, or a mixture (regional preference varies) should be ground to medium-coarse texture, not powder. Sprinkle nuts in a thin, even layer between every 5-6 phyllo sheets. The Syrup: Temperature and Timing Syrup temperature matters enormously. Hot syrup poured over hot-from-oven baklava creates crispy, non-soggy results. Bring syrup (water, sugar, honey, lemon) to a boil, simmer 15 minutes until slightly thickened.
Read Details
February 20, 2026
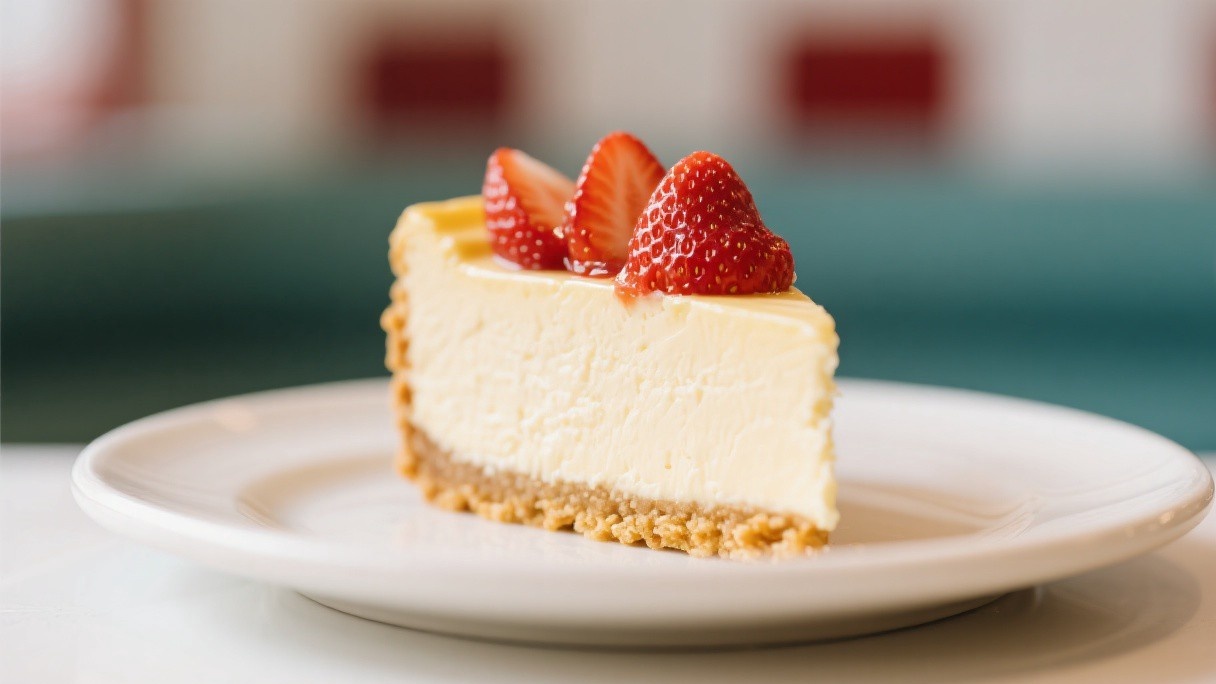
Perfect Cheesecake Baking Secrets: Achieving Creamy, Crack-Free Results Every Time
This detailed article walks you through cheesecake baking secrets, from fundamental principles to advanced techniques used by professionals. Key topics covered include water bath: non-negotiable, the slow cool revolution, overmixing: the hidden enemy, room temperature ingredients. Water Bath: Non-Negotiable A water bath (bain-marie) provides gentle, even heat that prevents over-baking at the edges. Wrap your springform pan in heavy-duty foil to prevent water seepage, then set in a roasting pan filled with hot water halfway up the sides. The Slow Cool Revolution Cracking happens when the center overheats and continues cooking after removal. For ultra-smooth texture, strain the batter through a fine mesh sieve after mixing. This removes any unmixed bits of cream cheese and ensures silky results. Room Temperature Ingredients Cold ingredients don't blend smoothly; they create lumps that cause uneven texture. Remove cream cheese, eggs, and sour cream from refrigerator 1 hour before baking.
Read Details
February 19, 2026
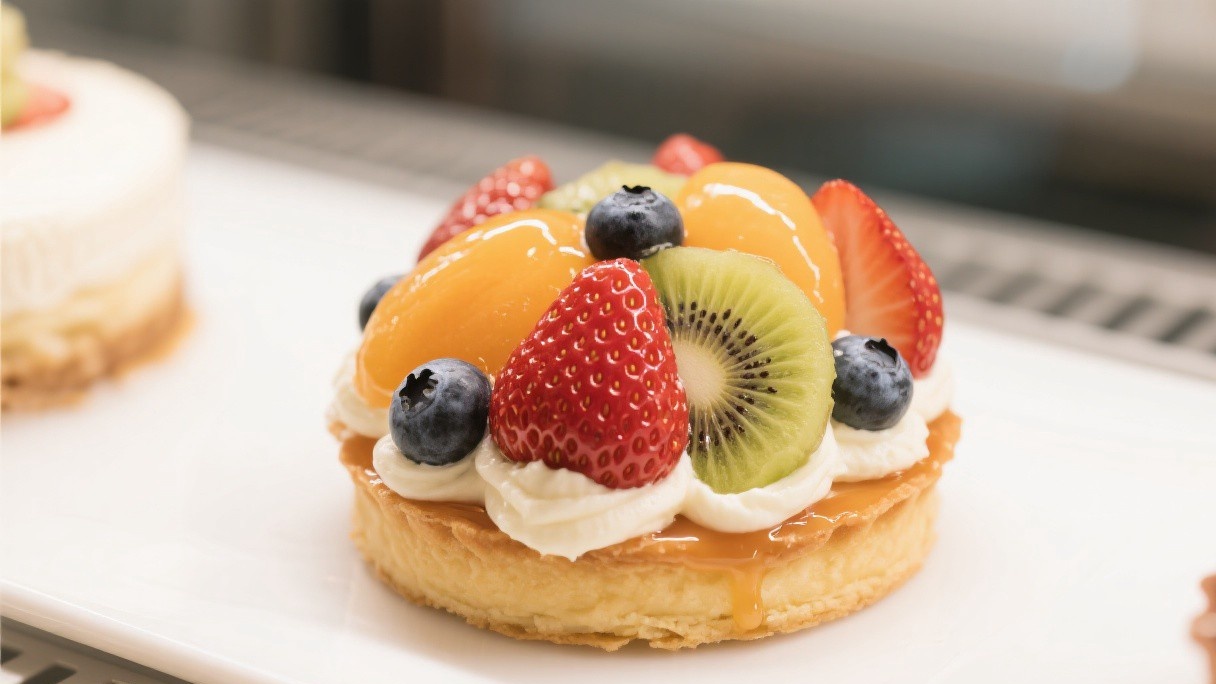
Homemade Fruit Tart Assembly: Professional Techniques for Stunning Pastry Creations
Discover the complete process of fruit tart assembly with this in-depth guide covering essential techniques, key ingredients, and professional secrets. Key topics covered include the pâte sucrée foundation, pastry cream: the essential filling, glazing: the professional touch, arrangement principles. The Pâte Sucrée Foundation Unlike flaky pie crust, tart shell (pâte sucrée) is sweet, tender, and designed to hold its shape when sliced. Cream butter and sugar until fluffy, add egg yolk and vanilla, then flour just until combined. Pastry Cream: The Essential Filling Pastry cream (crème pâtissière) provides the foundation that makes fruit tarts shine. At home, warm apricot preserves with a splash of water, strain, and brush over fruit. The glaze seals fruit (preventing browning), adds shine, and gives professional polish. For clear glaze without apricot flavor, use warmed corn syrup or commercial glaze. Arrangement Principles Professional tart arrangers consider color balance, size consistency, and direction.
Read Details
February 13, 2026
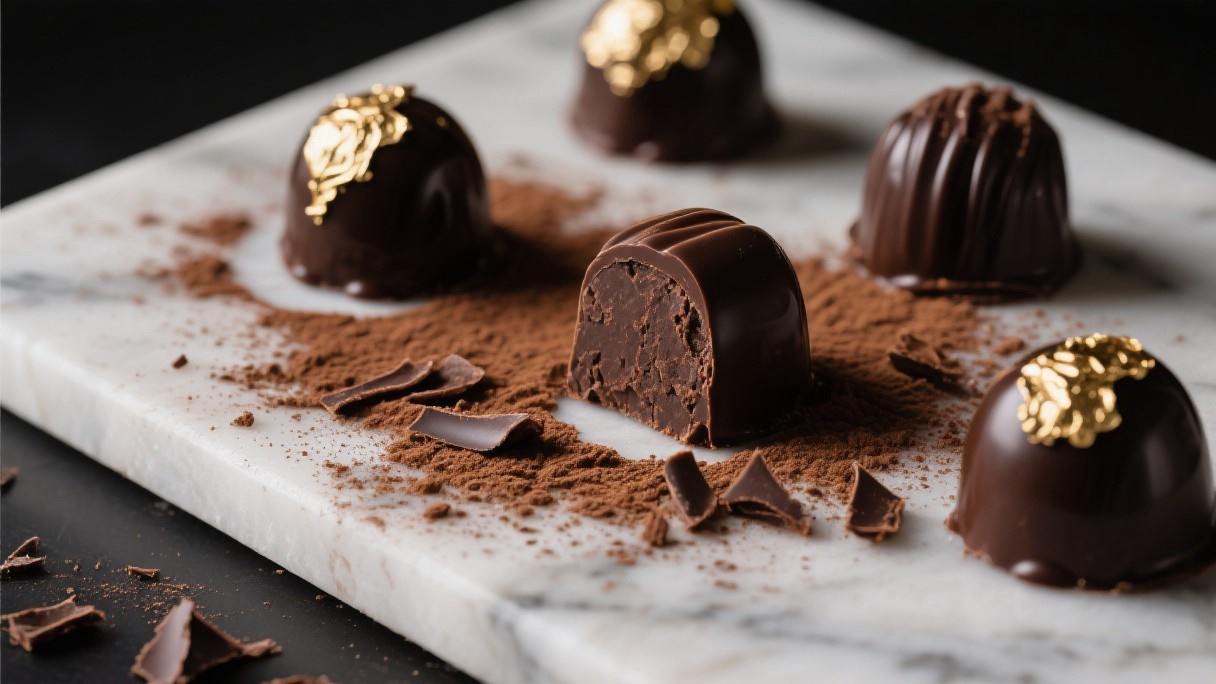
Artisan Chocolate Truffle Making: Professional Techniques for Gourmet Confections at Home
Learn how to master artisan chocolate truffle making with step-by-step instructions designed for home cooks seeking restaurant-quality results. Key topics covered include the ganache foundation, flavor infusions, shaping and setting, coating techniques. The Ganache Foundation Truffles begin with ganache—the emulsified mixture of chocolate and cream. The ratio determines consistency: more cream yields softer ganache for piped truffles; less cream creates firm ganache for rolled truffles. A basic ratio for rolling: 8 oz chocolate to 1/2 cup cream. Roll quickly between palms—the heat from your hands softens ganache, making rolling easier. Coating Techniques Traditional truffles are coated in cocoa powder, which hides imperfections and provides intense chocolate contrast. For a professional finish, temper chocolate and dip truffles using a fork, letting excess drip off. Alternatively, roll in finely chopped nuts, shredded coconut, or colored cocoa butter decorations. Truffles make exceptional gifts—arranged in pretty boxes, they're edible works of art.
Read Details

February 12, 2026
Classic Bread Pudding Variations: Transforming Simple Ingredients Into Comforting Desserts
This detailed article walks you through bread pudding variations, from fundamental principles to advanced techniques used by professionals. Key topics covered include the bread selection, the custard ratio, flavor variations, sauce pairings. Cut bread into 1-inch cubes and toast lightly if bread is very fresh—the drier it is, the more custard it drinks. The Custard Ratio The ideal bread-to-custard ratio ensures pudding that's creamy inside without being soupy. Standard ratio: 4 cups bread to 2 cups custard (milk, cream, eggs, sugar, vanilla). Fold in dried fruits (raisins, cranberries, cherries) rehydrated in warm water. Sauce Pairings Excellent sauce elevates bread pudding from good to extraordinary. Bourbon sauce (butter, sugar, cream, bourbon) pairs with classic vanilla. Even quality vanilla ice cream works, though warm bread pudding deserves warm sauce. Let it set 10 minutes after removing from oven; it slices cleanly and the flavors meld.
Read Details
February 11, 2026
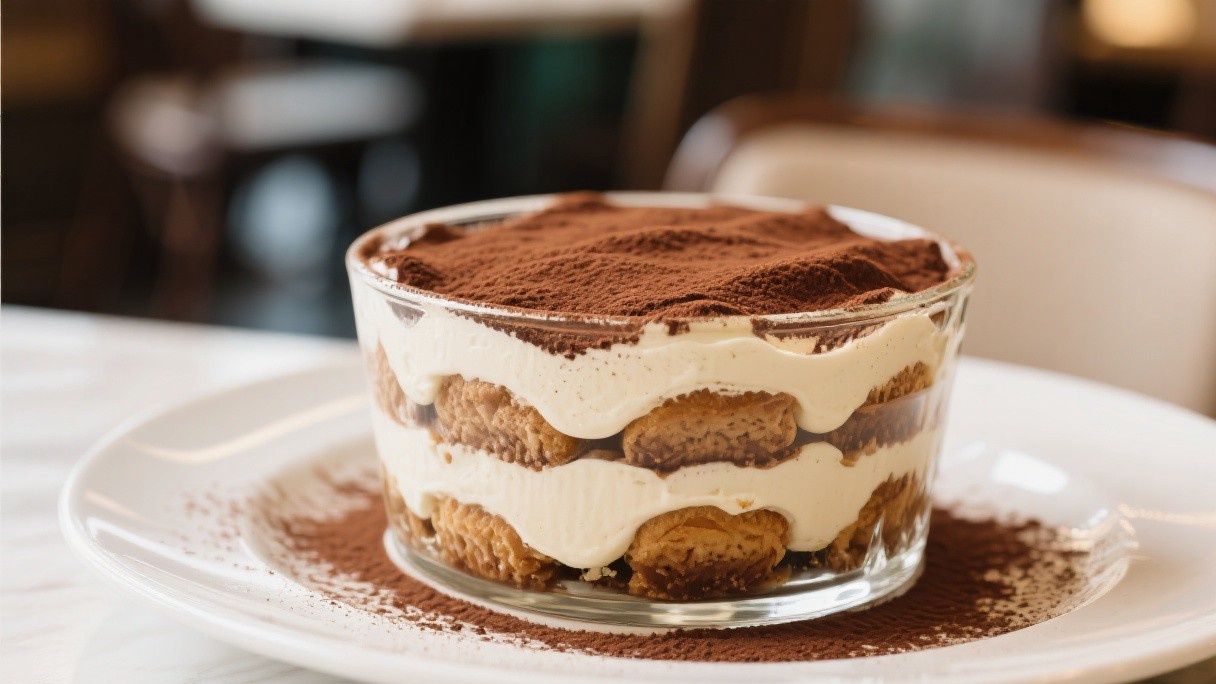
Authentic Italian Tiramisu: The Traditional Venetian Method Passed Down Through Generations
Discover the complete process of italian tiramisu with this in-depth guide covering essential techniques, key ingredients, and professional secrets. Key topics covered include the ingredients matter, the separated egg method, the critical soaking step, resting and serving. The Ingredients Matter Authentic tiramisu uses just six ingredients: mascarpone, eggs, sugar, espresso, Savoiardi (ladyfinger biscuits), and cocoa powder. Mascarpone must be Italian—American versions are too soft and wet. Eggs should be very fresh; you'll use raw whites so quality is essential. Dip each Savoiardo quickly—just 1-2 seconds per side—then immediately place in the dish. Too wet and the tiramisu becomes soup; too dry and it's chalky. The cocoa layer goes on top last, dusted generously just before serving to preserve its color. Resting and Serving Tiramisu needs time for flavors to meld and texture to set. The interior should quiver slightly when moved—the sign of proper texture.
Read Details