Japanese Gyoza: Folding Techniques and Dipping Sauce Harmony
Recipe
|
March 14, 2026
Learning to make Japanese Gyoza at home is one of the most satisfying culinary projects you can undertake. The process connects you to centuries of tradition while giving you room to develop your own style. Each attempt teaches you something new about ingredients, timing, and technique, building confidence with every batch.
Building the Filling with Proper Fat Ratio
The filling is where gyoza either succeeds or fails. I use ground pork with a fat content of roughly 30 percent, which provides richness without becoming greasy. For every 500 grams of pork, I add 200 grams of finely chopped napa cabbage that has been salted for 15 minutes and squeezed thoroughly to remove excess moisture. The cabbage needs to be dry; otherwise, water will pool inside the wrapper during cooking and cause structural unsatisfactory outcome.
To the meat and cabbage, I add 2 tablespoons of finely minced garlic, 1 tablespoon of grated ginger, 3 tablespoons of soy sauce, 1 tablespoon of sesame oil, and a pinch of white pepper. Mixing the filling in one direction for about 2 minutes develops a slight tackiness that helps the ingredients bind together without needing additional starch.
Wrapper Selection and Moisture Control
Store-bought round gyoza wrappers work reliably well and save considerable time. They typically come in packs of 50 to 100 and measure about 8 centimeters in diameter. The critical detail is keeping them covered with a damp towel at all times during the folding process. Once a wrapper dries out, it will not seal properly and will crack along the pleats during cooking.
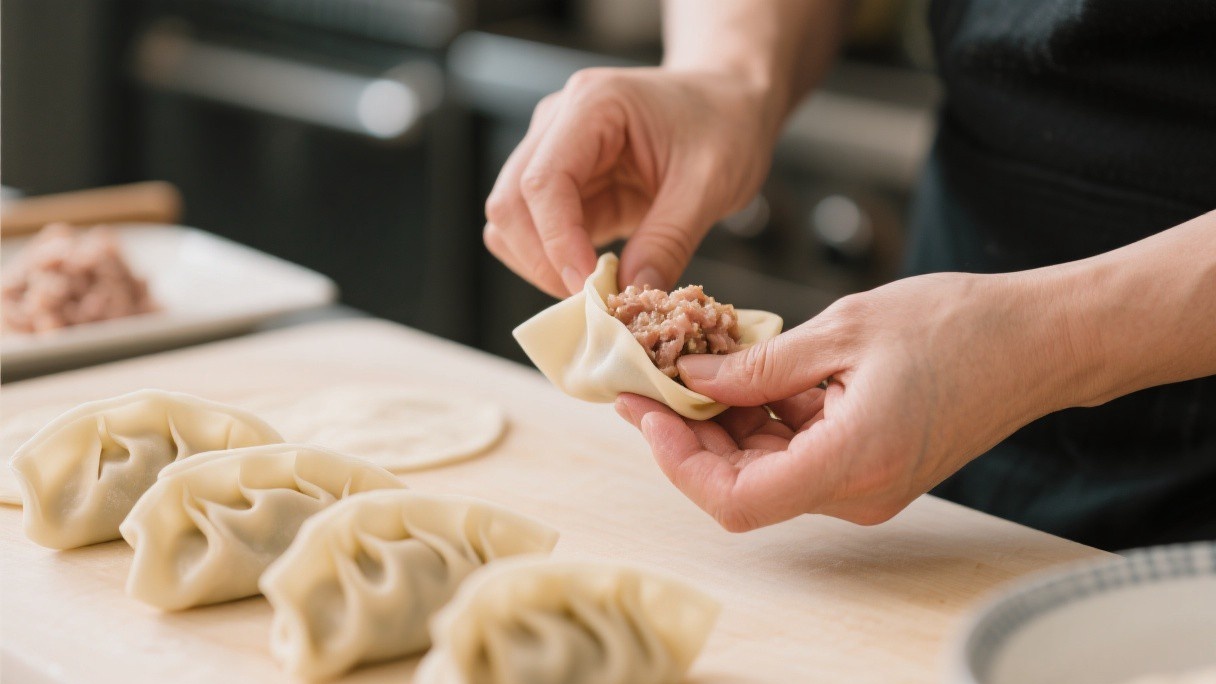
I place a single wrapper in my palm, add roughly 1 tablespoon of filling slightly off-center toward the bottom half, then dip my fingertip in water and trace the outer edge of the wrapper. The water activates the starch on the surface and creates a bond when pressed.
Mastering the Pleat Fold
Folding is the most intimidating part for beginners, but the motion is simpler than it appears. I hold the wrapper with the filling in my left hand, fold it in half to create a half-moon shape, and pinch the top center to seal it. Then I make three pleats on the left side by pinching the front edge of the wrapper and folding it toward the center, pressing each pleat firmly against the back layer.
I repeat the same three pleats on the right side, working from the top down. The result should be a crescent shape with a flat bottom that can stand upright in the pan. Consistency matters more than perfection; even slightly uneven pleats will cook fine as long as the seal is tight.
The Pan-Fry and Steam Method
Cooking gyoza involves three distinct phases: sear, steam, and crisp. I heat 1 tablespoon of neutral oil in a non-stick skillet over medium-high heat until it shimmers, then arrange the gyoza flat-side down in a tight spiral pattern. I let them sear undisturbed for 3 minutes until the bottoms develop a deep golden-brown crust. Then I pour in 60 milliliters of water, immediately cover the pan with a lid, and reduce the heat to medium.
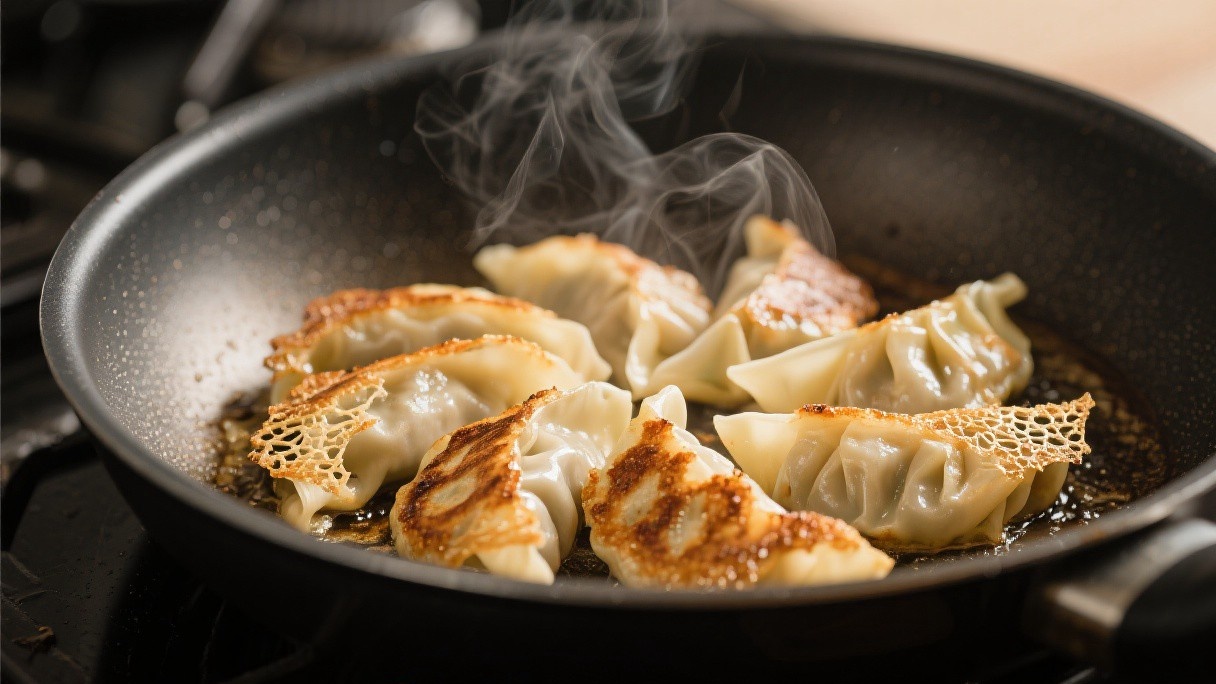
The steam cooks the wrapper and filling through in about 4 minutes. When most of the water has evaporated, I remove the lid, let the remaining moisture cook off for another 30 seconds, and drizzle a few drops of sesame oil around the edge of the pan to reinforce the crispness on the bottom.
Assembling a Balanced Dipping Sauce
The dipping sauce needs to cut through the richness of the pork and complement the savory filling without overpowering it. My standard ratio is 2 parts soy sauce, 1 part rice vinegar, and a few drops of chili oil. For a single serving, that translates to 2 tablespoons of soy sauce, 1 tablespoon of rice vinegar, a quarter teaspoon of sesame oil, and chili oil or rayu to taste.
Some people add a pinch of sugar to soften the acidity, but I find that the natural sweetness of the pork filling makes that unnecessary. The sauce should be served in small individual dishes so each person can adjust the heat level. A scattering of thinly sliced scallions on top adds a sharp, fresh bite that rounds out the combination.
Freezing for Later Use
Making gyoza in bulk and freezing them is remarkably practical meal-prep strategies I know. I arrange the uncooked, folded gyoza in a single layer on a sheet pan lined with parchment paper, making sure they are not touching. The pan goes into the freezer for 2 hours until the gyoza are completely frozen solid. Then I transfer them to a zip-top freezer bag, squeezing out as much air as possible.
Frozen gyoza keep for up to 3 months without any loss of quality. When I want to cook them, I do not thaw them first; I place the frozen gyoza directly into the oiled skillet and add an extra minute to the initial sear and an extra minute to the steaming phase. The cooking time increases by only about 3 minutes total, and. This produces indistinguishable from freshly made gyoza.
Homemade gyoza freeze beautifully, so double the batch and keep a stash for quick weeknight meals. The folding technique improves rapidly with practice, and soon you will develop a rhythm that makes the process almost meditative. A well-made gyoza, crispy on one side and tender on the other, is hard to beat.