Korean Makgeolli: Unfiltered Rice Wine Brewing at Home
Beverage
|
March 20, 2026
There is a reason Korean Makgeolli has endured as a beloved tradition across cultures. When done right, the results far surpass anything store-bought or restaurant-made. The secret lies in understanding a few core principles and applying them consistently. With the right approach, you can achieve professional-quality results in your own kitchen.
How Nuruk Transforms Rice
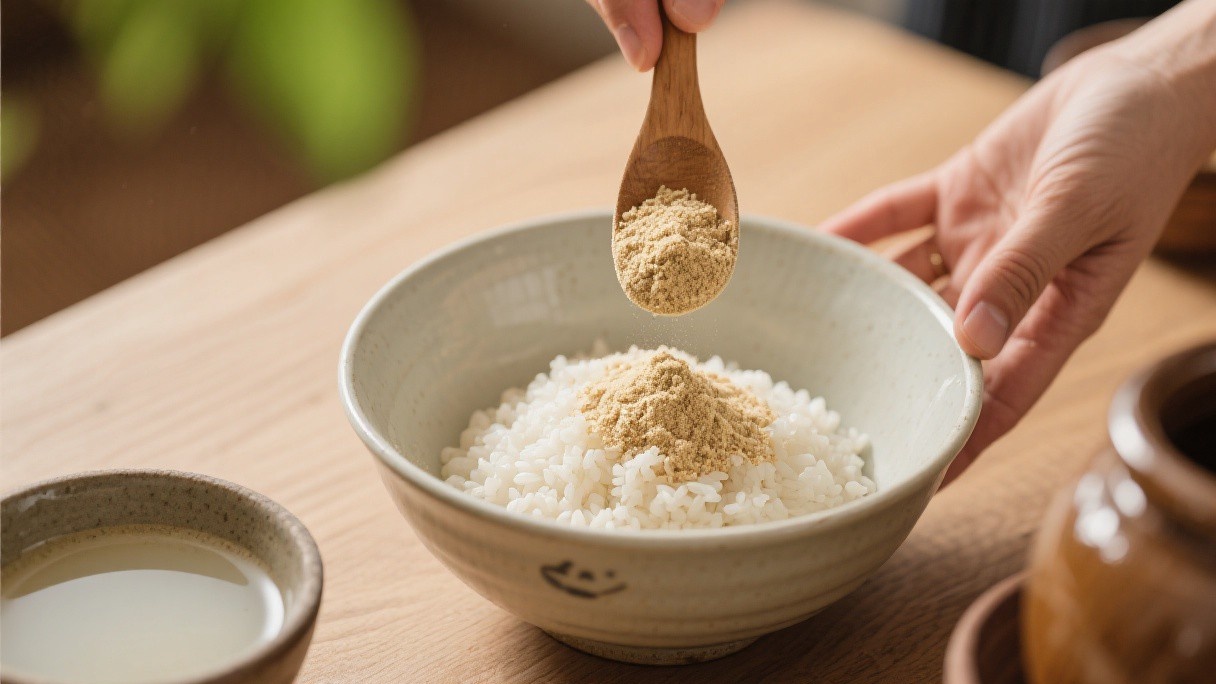
Nuruk is the fermentation starter that converts rice starch into fermentable sugars and then into alcohol. It is made from wheat, rice, or barley that has been soaked, ground, shaped into cakes, and left to ferment naturally, allowing wild yeasts and molds to colonize it. The primary microorganism in nuruk is Aspergillus oryzae, which produces the enzymes that break down starch.
I purchase dried nuruk from a Korean grocery store, breaking it into smaller pieces and grinding it to a coarse powder in a food processor before use. For a standard batch, I use 150 grams of nuruk per kilogram of rice. The quality of the nuruk directly affects the flavor of the finished makgeolli, and I have found that freshly produced nuruk gives cleaner, more complex results than older stock.
Preparing and Steaming the Rice
I use short-grain white rice, 1 kilogram per batch, which I wash in three changes of water until the runoff is clear. The rice soaks in fresh water for 4 hours, then I drain it and steam it in a steamer basket lined with cheesecloth for 40 minutes. Steaming, rather than boiling, is important because it gelatinizes the starch without adding excess water, which would dilute the final product.
After steaming, I spread the rice on a clean surface and let it cool to about 30 degrees Celsius, which is warm to the touch but not hot. If the rice is too hot when the nuruk is added, it can kill the sensitive microorganisms. The steamed rice should be fully cooked through but still retain some chew; undercooked rice will not gelatinize properly and will leave starch unconverted.
Mixing and the Primary Fermentation
I combine the cooled rice, ground nuruk, and 1.5 liters of water in a sterilized glass or plastic fermentation vessel. The water should be filtered or spring water; chlorinated tap water can inhibit fermentation. I mix everything thoroughly by hand, making sure the nuruk is evenly distributed through the rice. The vessel goes into a dark location at a temperature between 20 and 25 degrees Celsius.
I stir the mixture once a day for the first 5 days, which aerates the mash and redistributes the yeast. By day 2 or 3, bubbles begin to appear on the surface, and the mixture develops a sweet, slightly sour aroma. By day 5, the rice has broken down into a thick, porridge-like liquid, and the fermentation is visibly active with steady bubbling.
Secondary Fermentation and Carbonation
After 5 to 7 days of primary fermentation, I strain the liquid through a coarse sieve or cheesecloth to remove the rice solids. The liquid at this stage is cloudy and slightly effervescent, with an alcohol content of about 6 to 8 percent. I transfer it to bottles with swing-top caps, leaving about 3 centimeters of headspace. The bottles go into the refrigerator, where the fermentation slows dramatically but does not stop entirely.
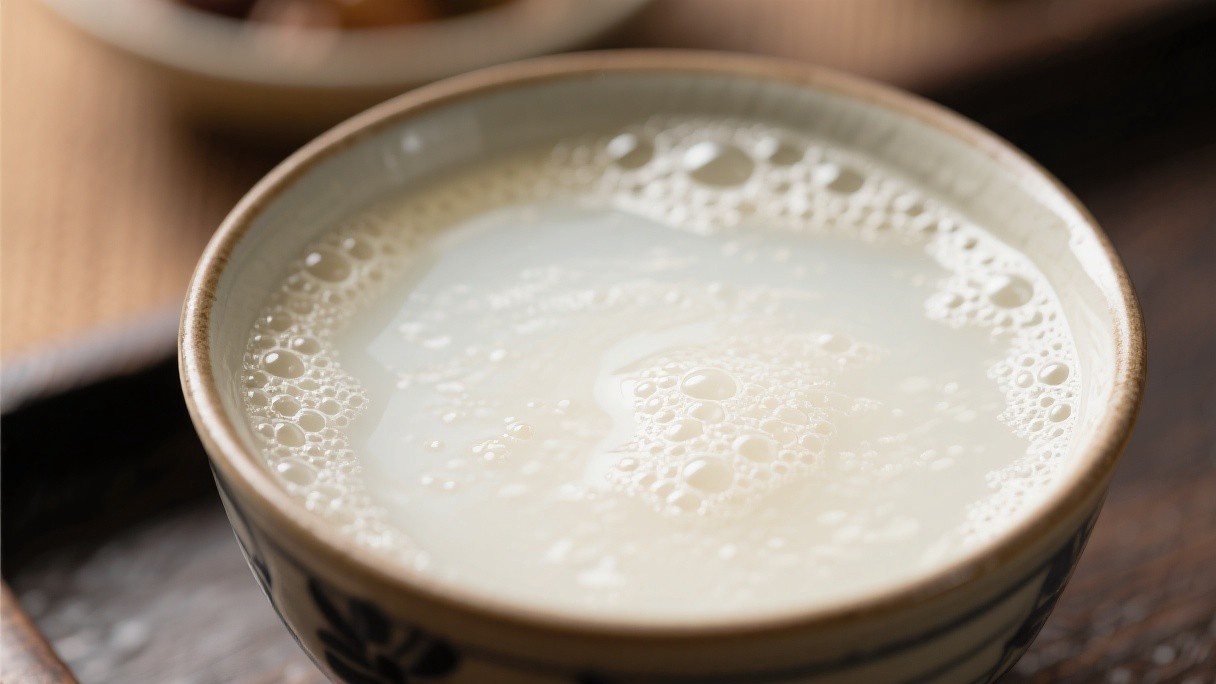
The residual yeast continues to produce a small amount of CO2, which carbonates the makgeolli naturally. After 3 to 5 days in the refrigerator, the makgeolli is ready to drink. It should be gently mixed before pouring, because the rice solids settle at the bottom of the bottle.
Serving and Flavor Profile
Makgeolli is traditionally served in shallow metal or ceramic bowls, poured from a height of about 15 centimeters to create foam on the surface. The flavor is slightly sweet, slightly tangy, with a pronounced rice character and a clean, refreshing finish. The alcohol content is low enough, typically 6 to 8 percent, to be sessionable. I serve it well chilled, and it pairs particularly well with Korean pancakes, jeon, and spicy dishes like tteokbokki.
Homemade makgeolli should be consumed within 2 weeks of bottling, because the natural carbonation diminishes over time and the flavor begins to flatten. The batch-to-batch variation is part of the appeal; each batch has a slightly different balance of sweetness, acidity, and effervescence depending on the nuruk and fermentation conditions.
Equipment Recommendations for Home Baristas
The investment in espresso equipment can range from a few hundred to several thousand dollars, but the most impactful upgrades are the grinder and the scale. I consider a quality burr grinder to be the single most important piece of equipment, because grind consistency directly affects extraction quality. A conical burr grinder in the 300 to 500 dollar range produces sufficiently consistent grinds for home use.
The scale should measure to 0.1 gram accuracy and have a fast response time; I use one that also includes a built-in timer. The espresso machine itself matters less than most people assume; a well-calibrated entry-level machine with a good grinder will produce better espresso than an expensive machine with a mediocre grinder. I recommend starting with a machine that has temperature stability and a capable steam wand, and upgrading the grinder first before considering a more expensive machine.