The Brisket Blueprint: Texas-Style Smoking Fundamentals
Meat
|
March 19, 2026
Understanding Brisket Blueprint opens up a world of culinary possibilities that most home cooks never explore. The difference between average results and exceptional ones comes down to a handful of key techniques, the right ingredients, and a willingness to practice. This guide covers everything you need to know to get started and improve with each attempt.
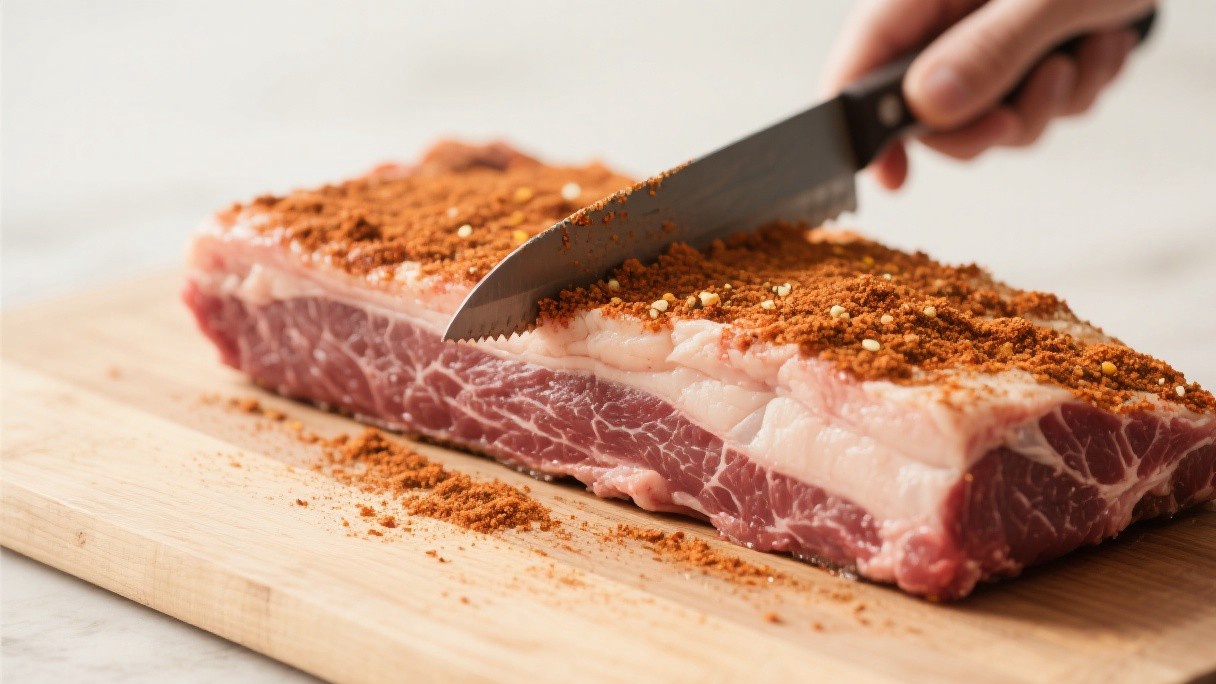
The Trim: Critical Foundation
Texas-style brisket starts with aggressive trimming. Remove hard fat deposits and silver skin from the flat (the leaner end). Leave the fat cap on top intact—about 1/4 to 1/2 inch. This fat bastes the meat during the long cook, keeping it moist despite 12-16 hours of smoking. A sharp, flexible knife makes this work manageable.
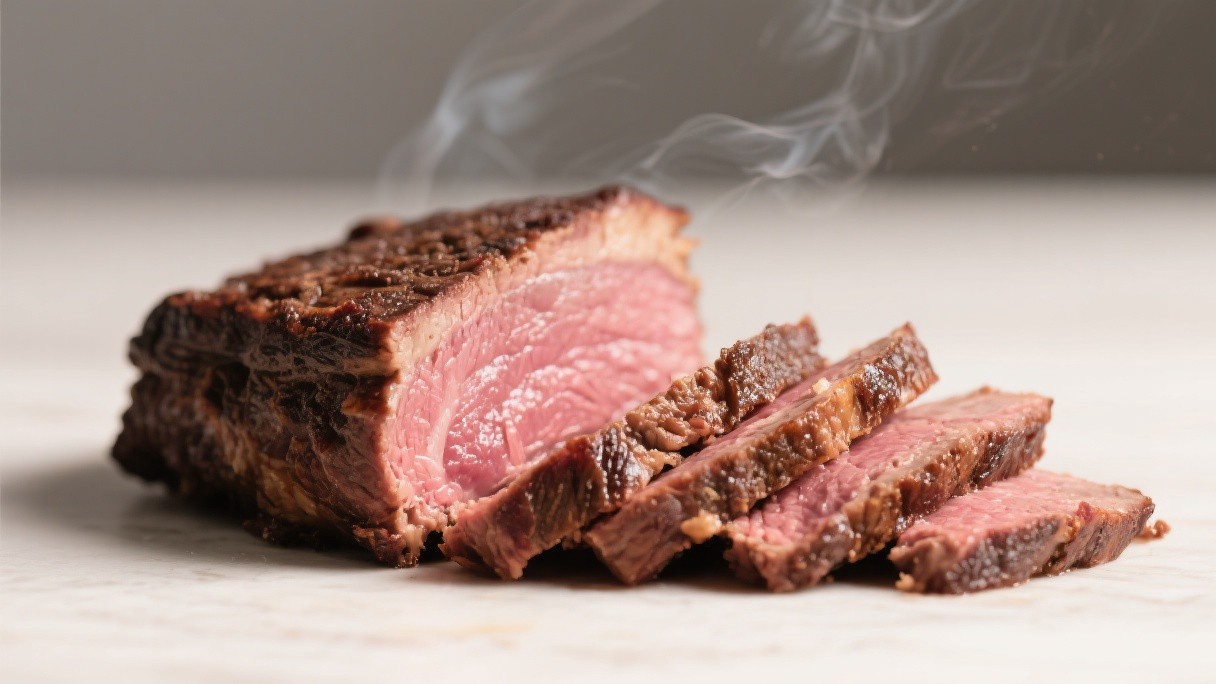
The Smoke Ring: Fact and Fiction
The pink smoke ring beneath the bark isn't just aesthetic—it's evidence of proper technique. It's created by nitrogen dioxide from combustion reacting with myoglobin in meat. Use oak or hickory wood for clean smoke. Maintain 225-250°F consistently. The ring develops in the first few hours; if you don't see it by hour 4, adjust your fire.
📷 Sliced Texas-style brisket showing smoke ring
The Stall: Brisket's Most Infamous Test of Patience
Brisket presents a uniquely frustrating challenge because it contains two distinct muscles—the lean flat and the marbled point—each rendering fat and breaking down collagen at different rates. When the internal temperature reaches the 150-170°F range, moisture begins pooling beneath the surface fat cap, and evaporation creates a cooling barrier that stalls the temperature climb for three to six hours. Unlike pork shoulder, which benefits from wrapping early, brisket demands a more nuanced decision.
Old-school Texas pitmasters insist on letting the stall run its course uncovered, arguing that unwrapped surface exposure concentrates smoke flavor and builds a superior bark. The tradeoff is time—sometimes adding four extra hours to an already marathon cook. The modern compromise, popularized by Aaron Franklin, uses pink butcher paper instead of foil: it allows the meat to breathe while trapping enough moisture to push through the plateau.
The key difference with brisket is that the point end, packed with intramuscular fat, actually benefits from the extended stall—the slow heat renders that fat into the surrounding muscle fibers, creating the buttery, melt-in-your-mouth texture that defines world-class brisket.
The Probe Test
Temperature alone doesn't tell brisket readiness—the probe test does. Insert a thin skewer or thermometer probe into the thickest part of the flat. It should slide in like softened butter with zero resistance. This happens around 195-205°F. Remove from smoker, wrap in butcher paper, and rest in a cooler (no ice) for 1-4 hours.
📷 Slicing brisket against the grain
Slice against the grain, about 1/4 inch thick. The flat yields slices showing smoke ring and bark; the point (fattier point end) produces extra-tender, marbled cuts. Both are excellent. Burnt ends—cubes of point with caramelized sauce—are a Dallas specialty worth trying.
Stall Management
I learned to recognize when the stall begins—the temperature plateau that frustrates many cooks. Wrapping at the right moment, neither too early nor too late, became my key technique. This decision point determines tenderness.
Slicing Technique
I slice against the grain, pencil-thick pieces that showcase the smoke ring and retain moisture. Proper slicing is as important as proper cooking—a poorly sliced brisket loses much of its appeal.
Selecting and Trimming the Brisket
A whole packer brisket weighs between twelve and sixteen pounds and consists of two distinct muscles: the flat and the point. The flat is leaner and slices neatly, while the point is fattier and more flavorful, ideal for burnt ends. Choosing a brisket with at least one-quarter inch of fat cap remaining protects the meat during the long smoking process. Trimming involves removing hard fat and silver skin while leaving the soft, pliable fat intact.
A sharp knife and patience are essential, as proper trimming can take thirty to forty-five minutes for a large brisket.
The Texas Crutch and Bark Development
During a long smoke, the brisket inevitably hits a stall around 150 to 170 degrees Fahrenheit, where the internal temperature plateaus for hours as moisture evaporates from the surface. Wrapping the brisket tightly in butcher paper at this point, a technique known as the Texas crutch, pushes through the stall by trapping moisture and heat.
The bark, that dark, flavorful crust on the exterior, forms during the first several hours of unwrapped smoking when the meat surface is exposed to the dry heat and wood smoke. Balancing bark development with moisture retention is the art of brisket smoking.
Wood Selection and Smoke Profiles
The type of wood used for smoking brisket profoundly affects the final flavor. Post oak, the traditional choice in Central Texas, provides a medium-smoke flavor that complements beef without overpowering it. Hickory delivers a stronger, more assertive smoke that works well for those who prefer a pronounced smoky character. Mesquite burns hot and fast with an intense, earthy smoke that is best used in combination with milder woods.
Fruit woods like apple and cherry add a subtle sweetness and beautiful color to the bark. Most experienced pitmasters use a combination of woods, typically seventy-five percent post oak and twenty-five percent fruit wood, to create a complex, balanced smoke profile.
Slicing Technique for Maximum Tenderness
Proper slicing technique is the final and perhaps most overlooked step in serving exceptional brisket. The flat and point muscles have different grain directions, so they must be sliced separately. The flat should be sliced against the grain, approximately one-quarter inch thick, at a slight angle. The point, with its looser grain and more fat, can be sliced slightly thicker or chopped for burnt ends. A long, sharp slicing knife with a flexible blade is essential for clean, even cuts.
Store any leftovers properly and reheat gently to preserve texture and flavor. Many of these preparations actually improve overnight as flavors meld and develop. Planning ahead means you can enjoy the fruits of your labor across multiple meals, making the effort even more worthwhile.